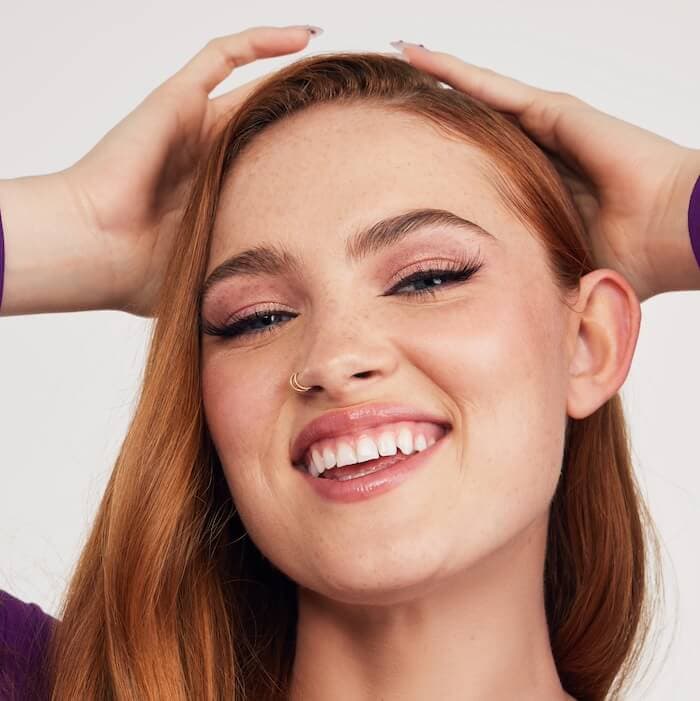
A Step-by-Step Guide on How to Apply Your Makeup Like the Pros
If you’ve watched a full-face makeup tutorial on YouTube or followed a beauty hack on TikTok, you’re not alone if the step-by-step instructions seemed ultra-complicated or like they’re missing some crucial information. What happened to going over the basics for beginners? As much as we all love the most epic wings, eyelid embellishments, and negative-space eyeliner, we still have some questions about how to apply makeup.
If you have a bathroom drawer full of makeup products and want to know how to apply that makeup so it looks just as good as the glam all over your feed? Keep reading because this step-by-step guide (complete with product recommendations) is just what you’ve been looking for.
About the Experts:
Matin Maulawizada is a New York-based makeup artist. He has painted the faces of celebrities including Mandy Moore, Claire Danes, and Tracee Ellis Ross.
Amanda Bell is a makeup artist in London. She has been professionally glamming for more than 25 years and is currently the PIXI BEAUTY Global Director of Education and Artistry.
Here’s How to Apply Your Makeup Like a Total Pro
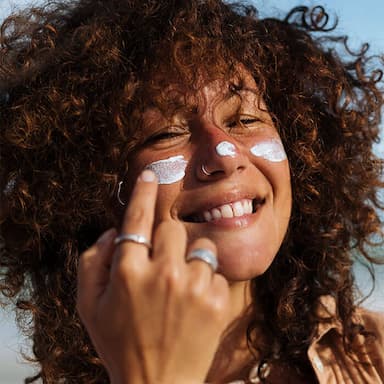
1. Start With Skincare
The truth is, no pro makeup artist starts a look without the proper skin prep. A good cleanse, light exfoliation, serums, and moisturizer (plus sunscreen during the day!) will help plump up your skin and have it looking its best both without and under makeup. Celebrity makeup artist Matin Maulawizada will even give the skin a little relaxing massage while working in the products. “I take the moisturizer and warm it up between the palms of my hands, and then massage it into the skin with upward and outward circular motions,” he says.
Based on your skin type, you can customize your pre-makeup skincare prep. Serums containing hyaluronic acid help hydrate and plump oily skin without adding extra oils, while ceramide-rich serums work amazing for those with more dry complexions. As for moisturizer, water-based gel-creams will be a game-changer for combo or oily skin, and richer creams will make even the driest skin glow to the gods.
2. Swipe on Some Primer
While you don’t need a makeup primer all the time, it really helps keep your makeup in place—especially on a busy or warm day. “A proper primer is meant to allow your makeup to wear the same all over your face,” says Maulawizada. “Meaning that the makeup won’t disappear, sit on the surface of the dry areas of the skin, and will not separate on the oily areas such as the T-zone.” Give your skincare a minute or two to fully absorb, then work a pea-size dollop of primer over your skin. Blend it all over or focus the product just in your T-zone, depending on the look you’re going for.
If you have dry skin, look for a hydrating makeup primer, like CIATÉ LONDON Watermelon Burst Hydrating Primer. It’s infused with watermelon extract, which is packed with vitamin C, antioxidants, and hyaluronic acid to lock in all that non-greasy hydration. Those with oily skin should opt for an oil-absorbing or pore-blurring primer.
Something to be mindful of is that the type of primer you use can affect the finish of the foundation. “A primer with a glow can make the base look more airbrushed and have a softer lit-from-within appearance,” says makeup artist Amanda Bell. “Whereas, a more matte-textured primer can make the base appear more velvety.” If a matte finish is what you’re after, the lightweight ELIZABETH MOTT Thank Me Later Face Primer will help keep your complexion shine-free and minimize the appearance of pores.
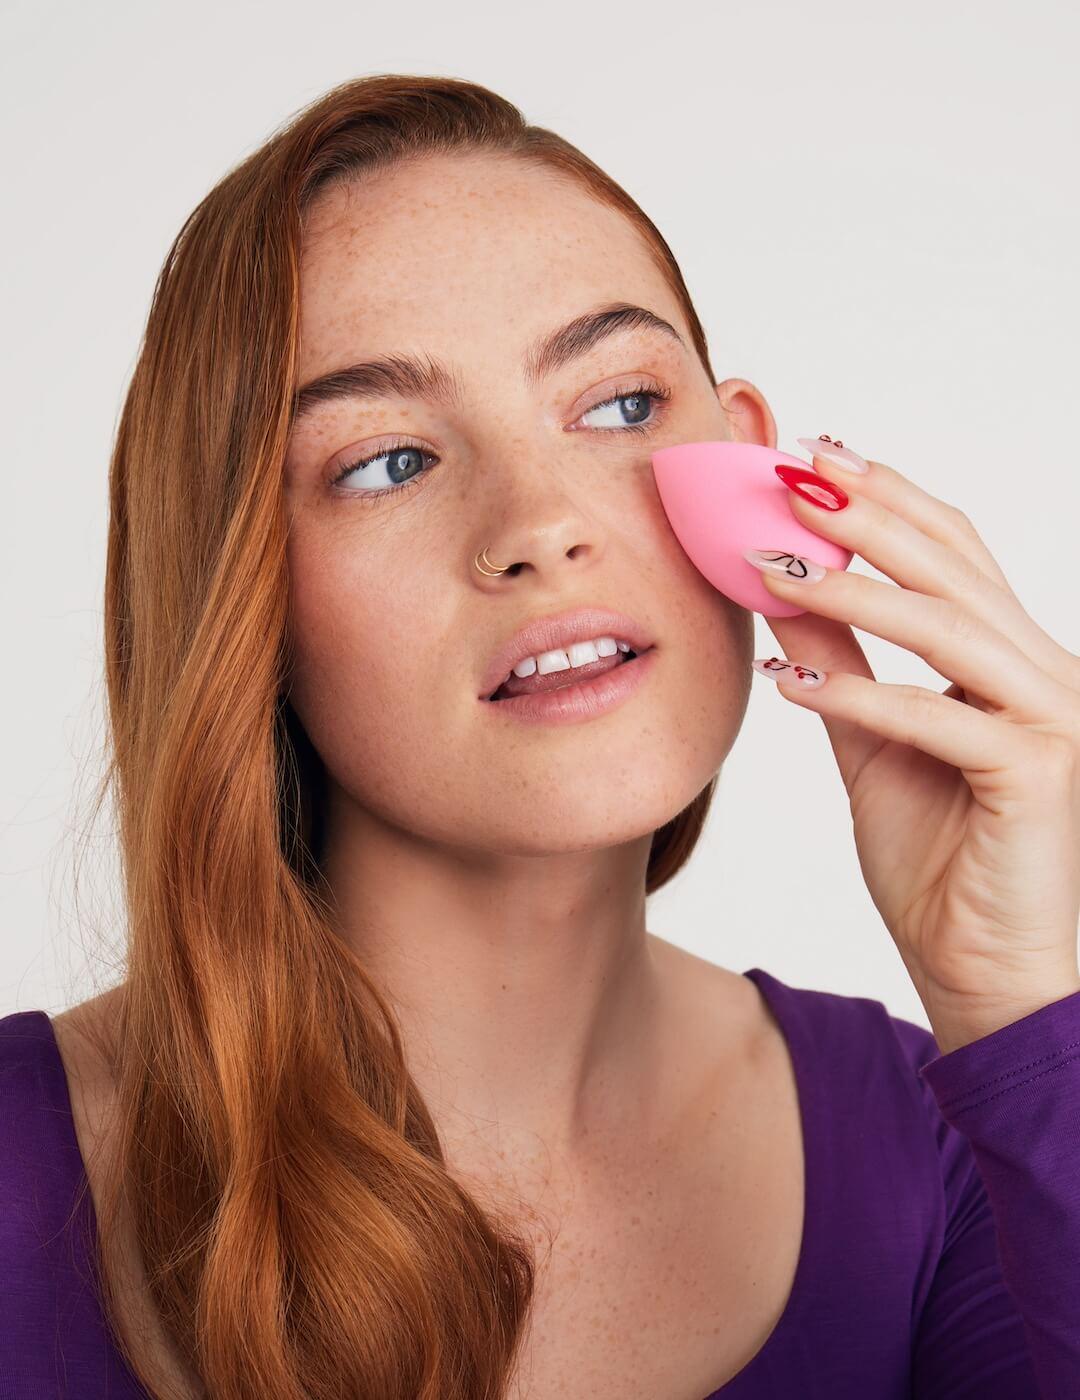
3. Apply Your Foundation of Choice
Foundation (or whatever you choose for your base: tinted moisturizer, BB cream, skin tint, you name it!) is super customizable. You can apply foundation with your fingers, a makeup sponge, or a foundation brush—it’s all up to your comfort level and the finish you’re looking for. Maulawizada recommends using your fingers when applying a small amount, such as one layer of lightweight liquid foundation or a BB cream.
For a more full-coverage yet natural look, he recommends distributing the foundation evenly with a synthetic foundation brush to the flat parts of the face (like your cheeks, forehead, and chin), then, with less product on the brush, apply foundation to your T-zone. “This will create the illusion of less makeup,” he says.
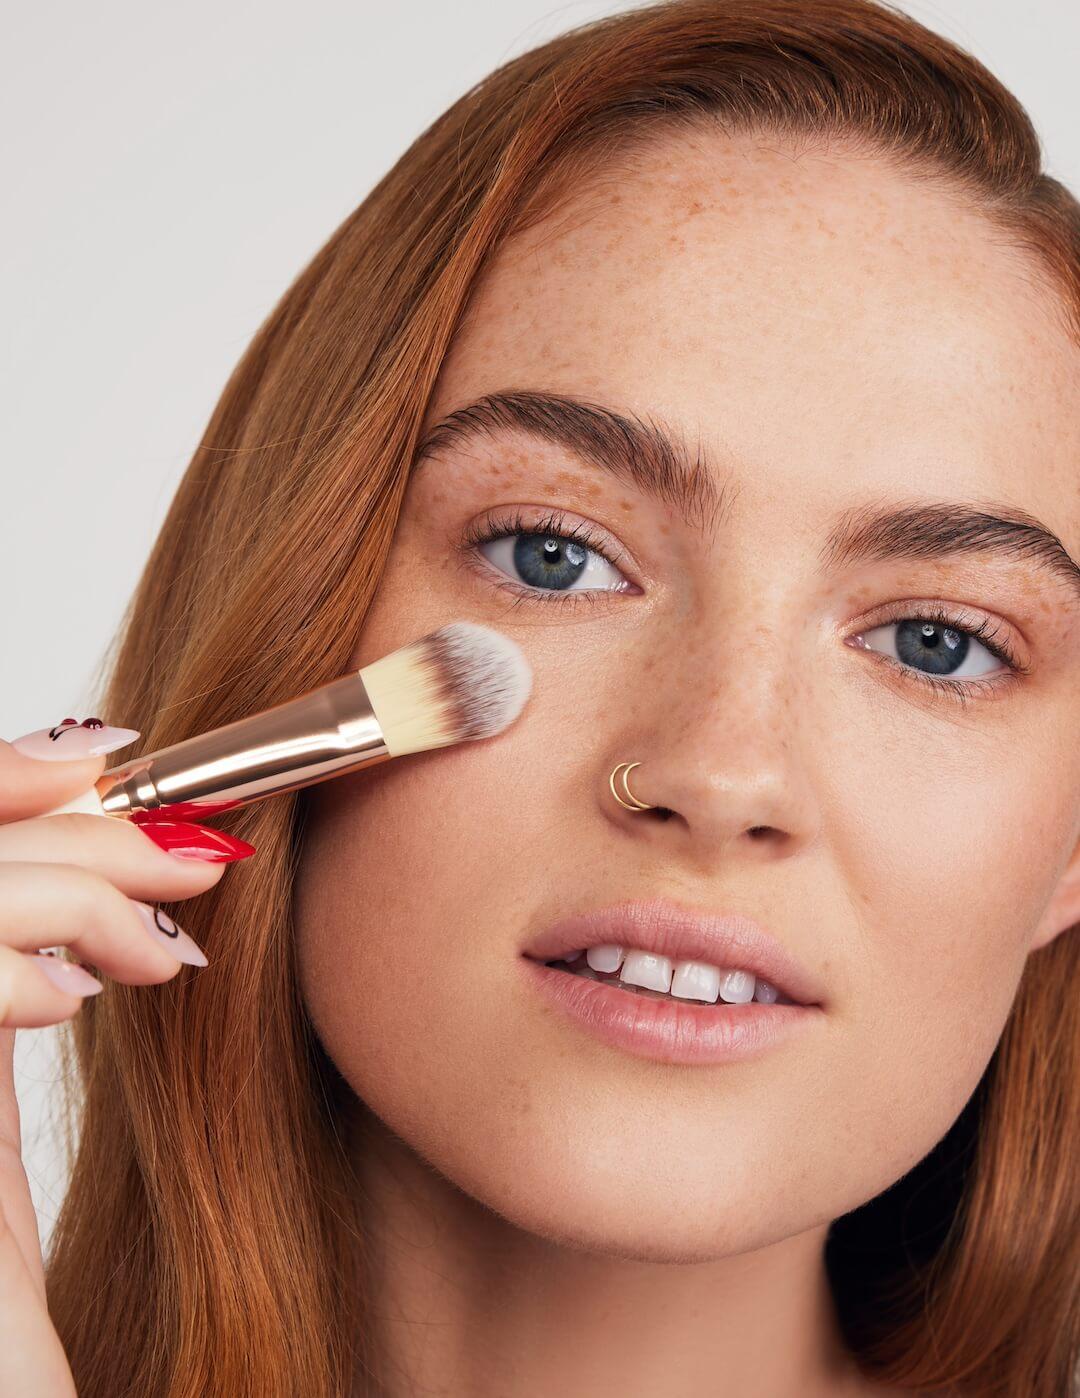
4. Conceal Where You Want More Coverage
Just like foundation, you can apply concealer with either a makeup brush, beauty blender, or just your fingers (Note: A brush will give you a more full-coverage makeup look). Still, when it comes to concealer, remember that a little goes a long way. You really only need to apply concealer to the areas you want to hide.
Dot concealer under your eyes to cover dark circles, starting small and building up as needed to avoid looking cake-y on the delicate skin around the eyes, says Maulawizada. Then, apply a little concealer to any blemishes, dark marks, or red spots, allowing the formula to set for a minute or two before blending and applying any type of powder on top.
It’s also important to note different types of concealers and the purposes they serve. “Concealers with a creamy texture are more versatile,” Bell explains. “You’ll be able to use them under the eyes and on other parts of the face, as they blend seamlessly into the skin. Richer and thicker formulations, like concealer in a stick or pot, are superb for covering spots and blemishes."
If you opt for a creamy formula, Bell advises to “pat in with clean fingertips or a makeup sponge.” With richer stick and pot concealers, “It’s worth investing in a precision concealer brush,” she says. “These allow you to be very targeted with where you add the extra coverage. Once you have applied these types, dot gently with your brush to blend into the skin.”
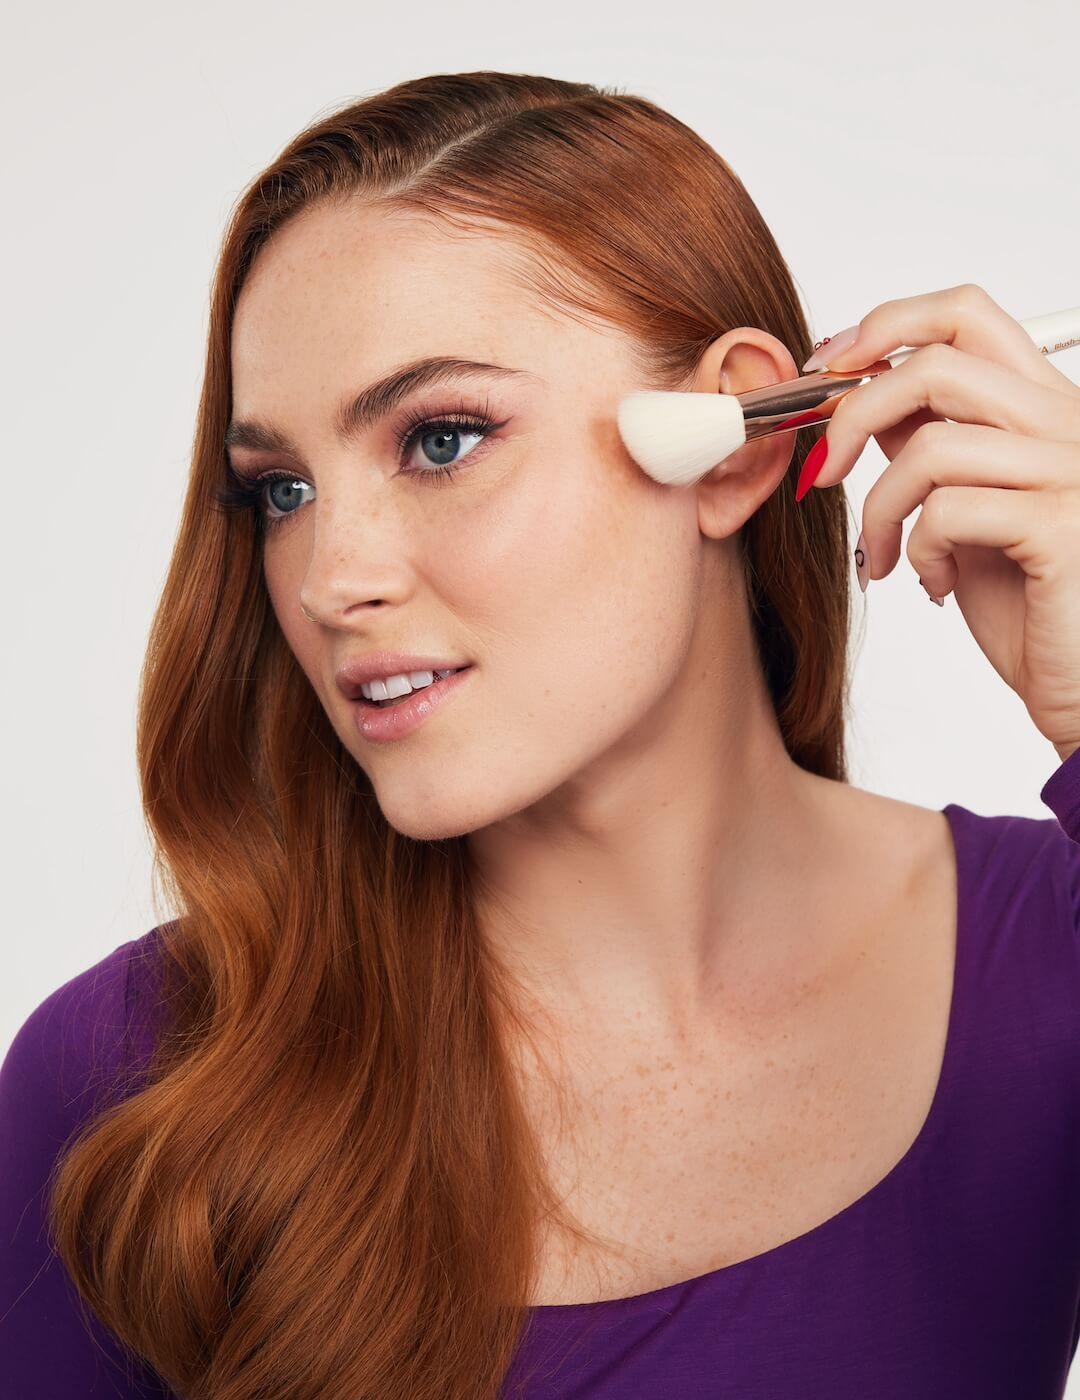
5. Create Some Dimension
Bronzer is a super versatile makeup product because it can be used to contour or just add a burst of warmth to your skin, like you just got back from a beach vacation (minus the sun damage!). When applied as a contour to sculpt, you want to only add color where there would be natural shadows on your face, like under your cheekbones, along your jawline, and on your forehead around your hairline. You can also use the contour to create the visual illusion of a recessed area if you’re trying to change the shape of your nose or fake the look of a shorter forehead. ”Contour should mimic the color of shadow on your skin,” says Maulawizada, so be careful not to choose a color too deep for your skin tone, and opt for a cooler undertone.
For traditional bronzer application, Bell recommends the continuous 3-shape method, which adds color in a 3-shape where the sun would naturally hit you. Swirl a fluffy powder brush in your bronzer, tap off any excess powder, then start on your forehead near your hairline. Sweep the brush out and down along your hairline and across the tops of your cheeks, then continue sweeping it back again toward your ears and then down along your jaw and chin. “This technique refines the bone structure while simultaneously adding warmth,” says Bell.
6. Add Back Color to Your Face
After bronzer, you’ll want to apply blush to add back a bit of warmth that your foundation took away—only this time to strategic areas. Think the apples of your cheeks for a doll-like effect, tops of your cheeks and across the bridge of your nose for a sun-kissed look, or along your cheekbones and temples using the newly re-popularized draping technique.
“[For draping], you take the blush higher than just the apples of your cheeks,” Bell says. “It gives an incredibly vivacious look, really adding a pop of color and also adding extra dimension to the face. Start at the apple of the cheek and sweep the brush higher towards the hairline in a teardrop shape. This draping technique works beautifully with cream, gel, liquid and powder blush.”
While the blush placement you opt for works equally no matter the blush formula you choose, the applicator you use should differ. “For a gel and liquid, I like to use a soft makeup sponge,” Bell says. “For a powder blush, I use a soft fluffy cheek brush so I can blend the blush into the skin in a soft circular movement for an effortless look.”
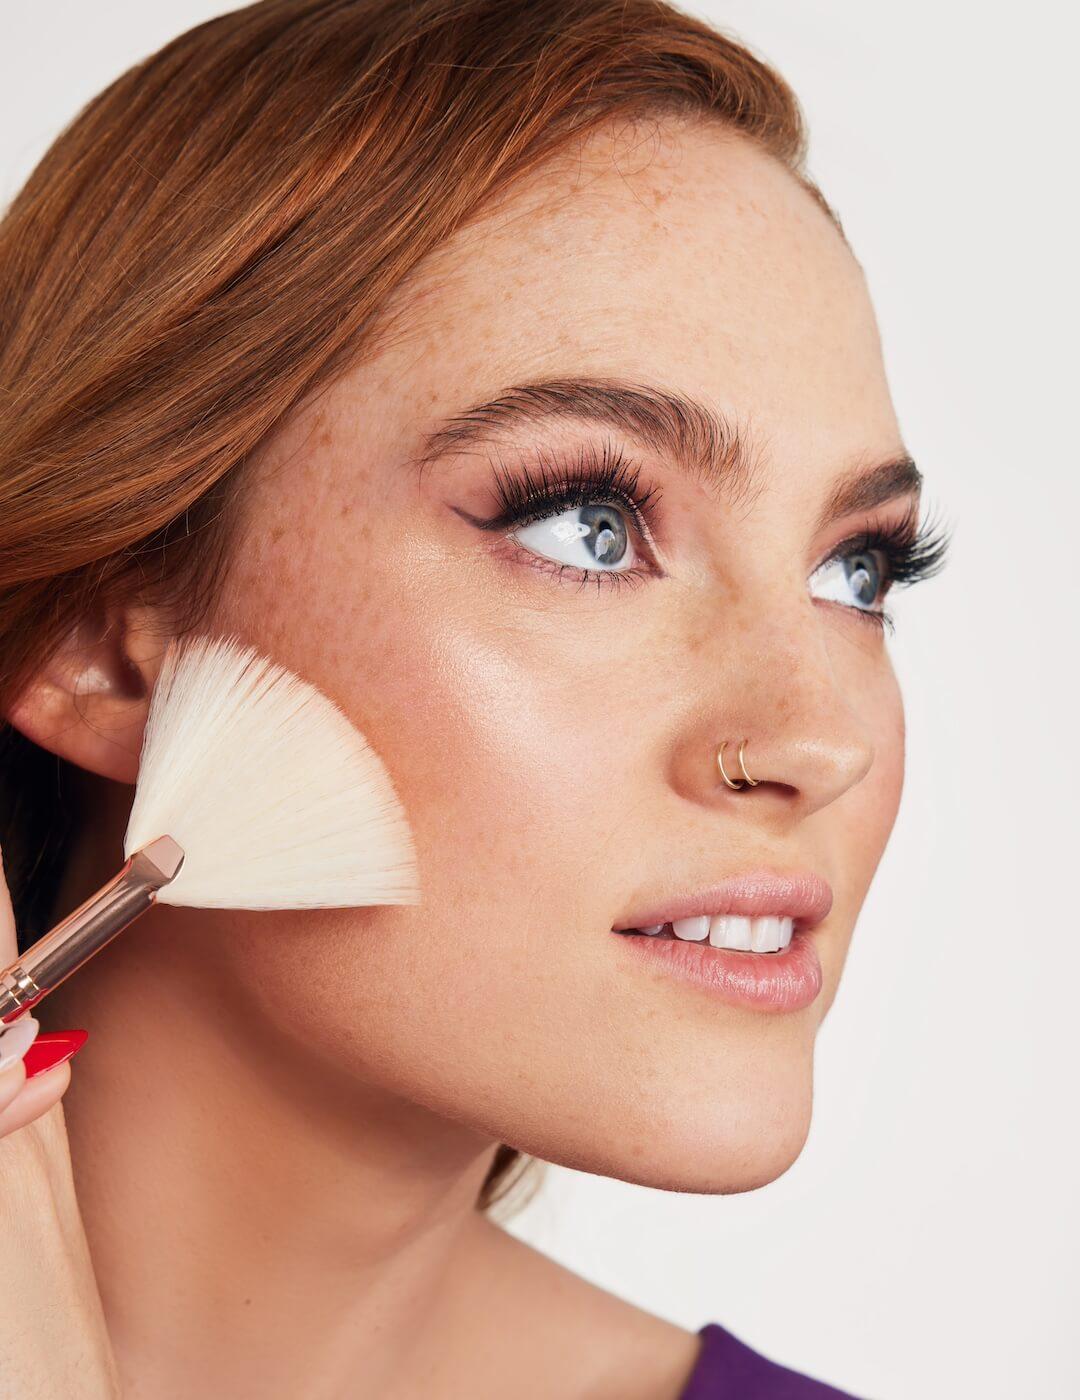
7. Highlight the High Points
If you ask us, no makeup look is complete without highlighter. You can go for either a swipe of highlighter so blinding you can see it from space, or a simple, natural-looking glow. “Highlighter can be applied wherever you want to bring attention, like cheekbones or even clavicles,” says Maulawizada. He warns that although a tip-of-the-nose highlight is trendy on TikTok, it can look a bit dramatic and unnatural IRL. (Unless you’re going for that, of course, then rock on!)
Just like bronzer and blush, highlighter comes in a ton of different shades and formulas, like gels, liquids, powders, creams, and more, so the highlighter world is your oyster!
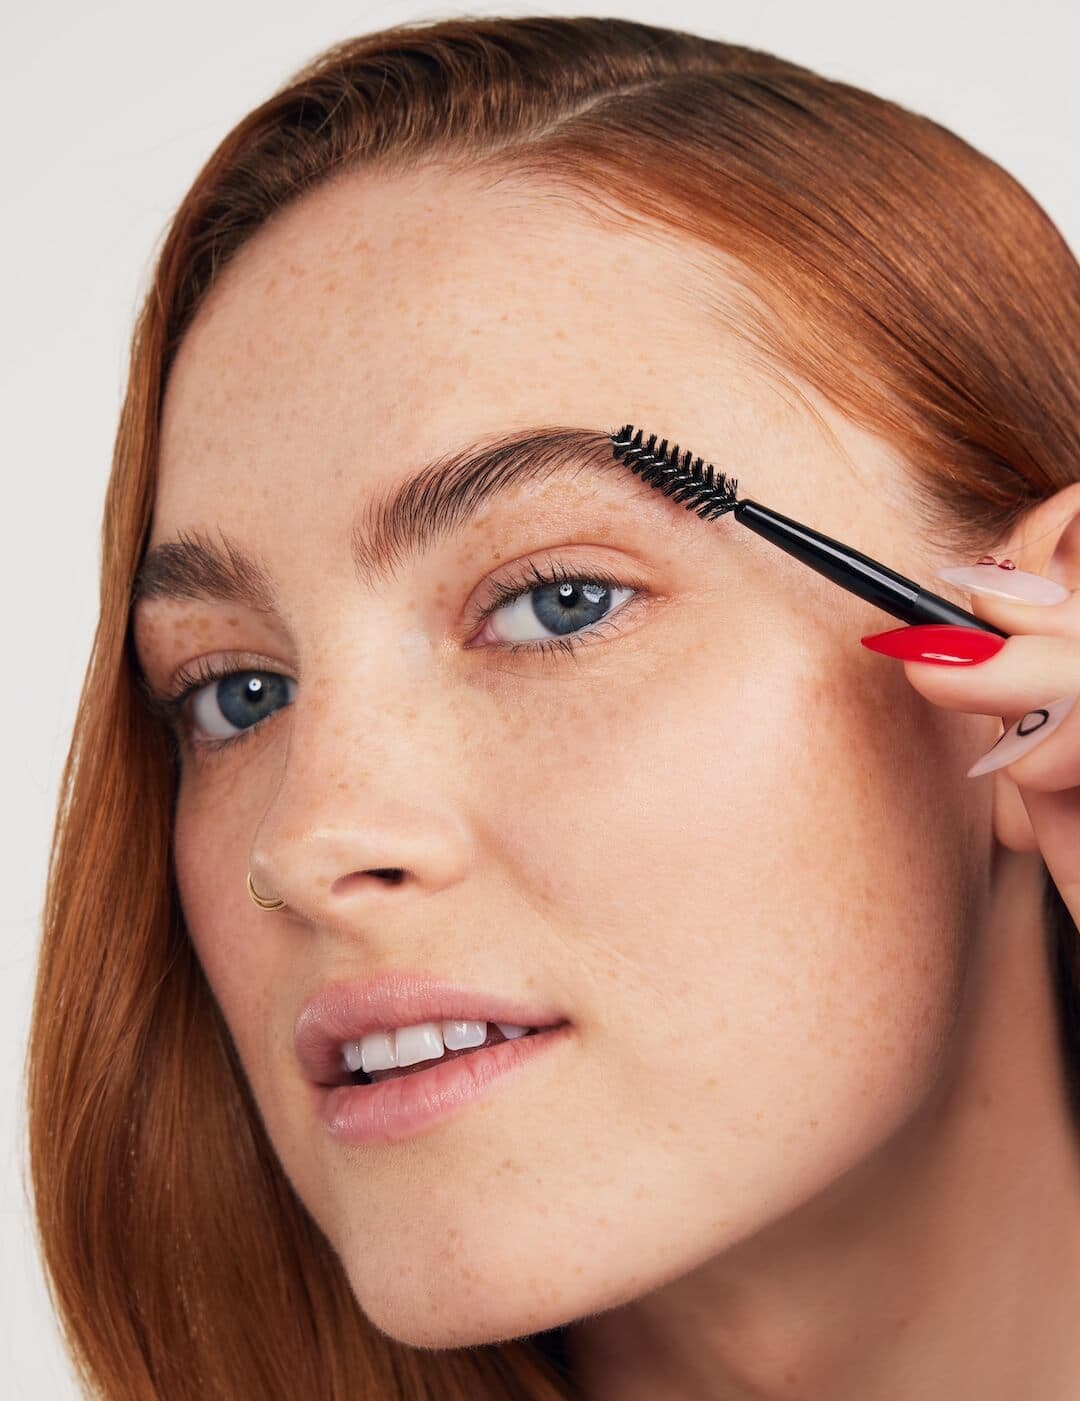
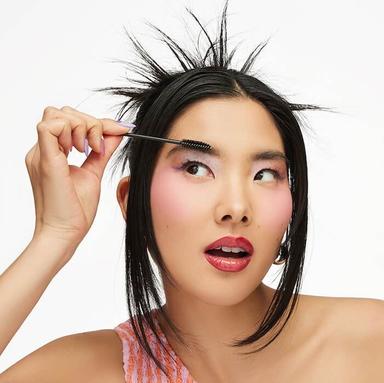
8. Groom Your Brows
This step in your makeup routine is all about grooming your brows to frame your face and enhance your overall makeup. Paying attention to your brows is essential because they can either make or break your look. Well-groomed brows can add symmetry to your face, draw attention to your eyes, and give your entire appearance a polished finish.
When it comes to grooming your brows, there are several product options depending on your preference and desired outcome. One popular choice is a brow pencil, which allows for precise filling and shaping. Brow powders are great for achieving a softer, more natural look, while brow gels help set your brows in place and add volume. For those seeking a long-lasting solution, eyebrow pomades offer a waterproof and smudge-proof option.
Start by brushing your brow hairs upwards with a spoolie brush to reveal their natural shape. Then, use your chosen brow product to fill in any sparse areas, following the natural arch of your brows. Remember to blend the product well with your clean spoolie brush for a seamless finish. If you want, you can even use a concealer to clean up the edges and define the shape further. Finally, set your brows in place with a clear or tinted brow gel to make sure they stay put.
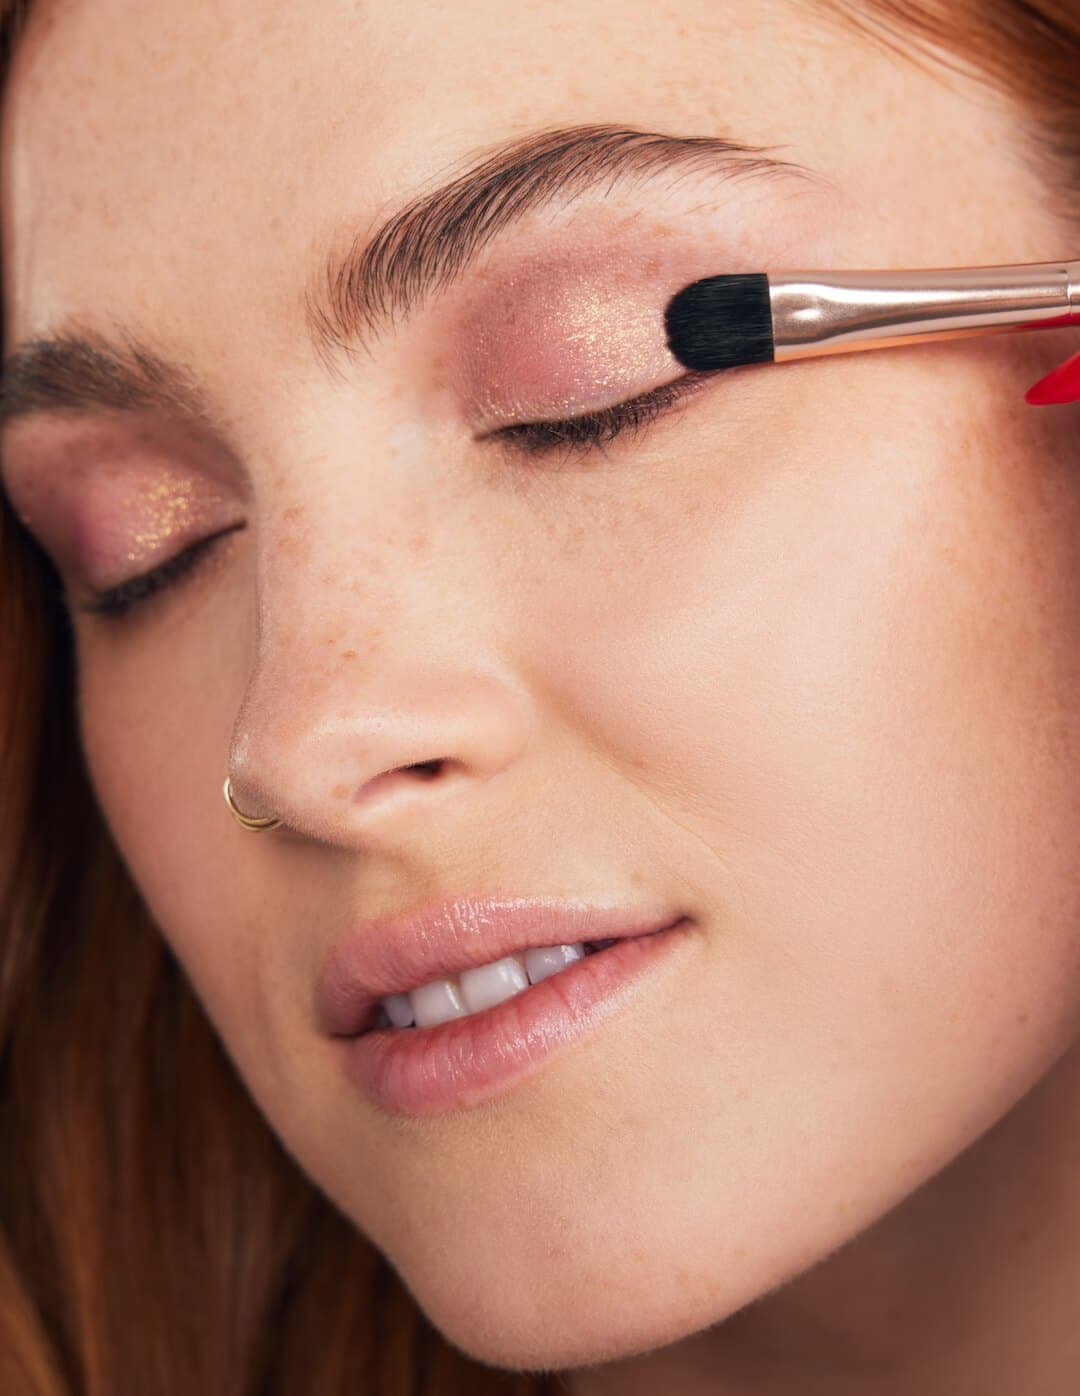
9. Experiment With Eyeshadow
There are numerous ways to apply eyeshadow, but when it comes to the basics, there are a few things to remember. “The light shades similar to your skin tone act as a base,” explains Maulawizada. “A darker shade creates shape and definition, as well as contours the eye. Shades in between are for the lids to marry the two seamlessly.”
And that shimmer? Add it to the inner corners of your eyes to make them look big and bright. Check out our favorite eyeshadow palettes for every option you’d need for a soft glam or intense color payoff.

10. Define Your Eyes With Eyeliner
There are those who can’t live without eyeliner and those who only bust it out on special occasions—but it’s always nice to have a basic black liner in your makeup bag for when the feeling strikes. Maulawizada likes to use a pencil eyeliner to make eyeshadow deeper and more dramatic. “It can be dotted between lashes to create a fuller lash base,” he says. “And of course as a liner sharply or smudged to create definition around the eyes.”
We love the TARTE tarteist™ Double Take Eyeliner in Black because it’s dual-ended for all the possibilities. Use the liquid eyeliner side to create crisp lines or sharp wings. The clay-infused gel pencil on the other side is perfect for applying to your waterline to make your eyes pop. If you make a mistake, no worries! Take a q-tip soaked in micellar water to clean it up.
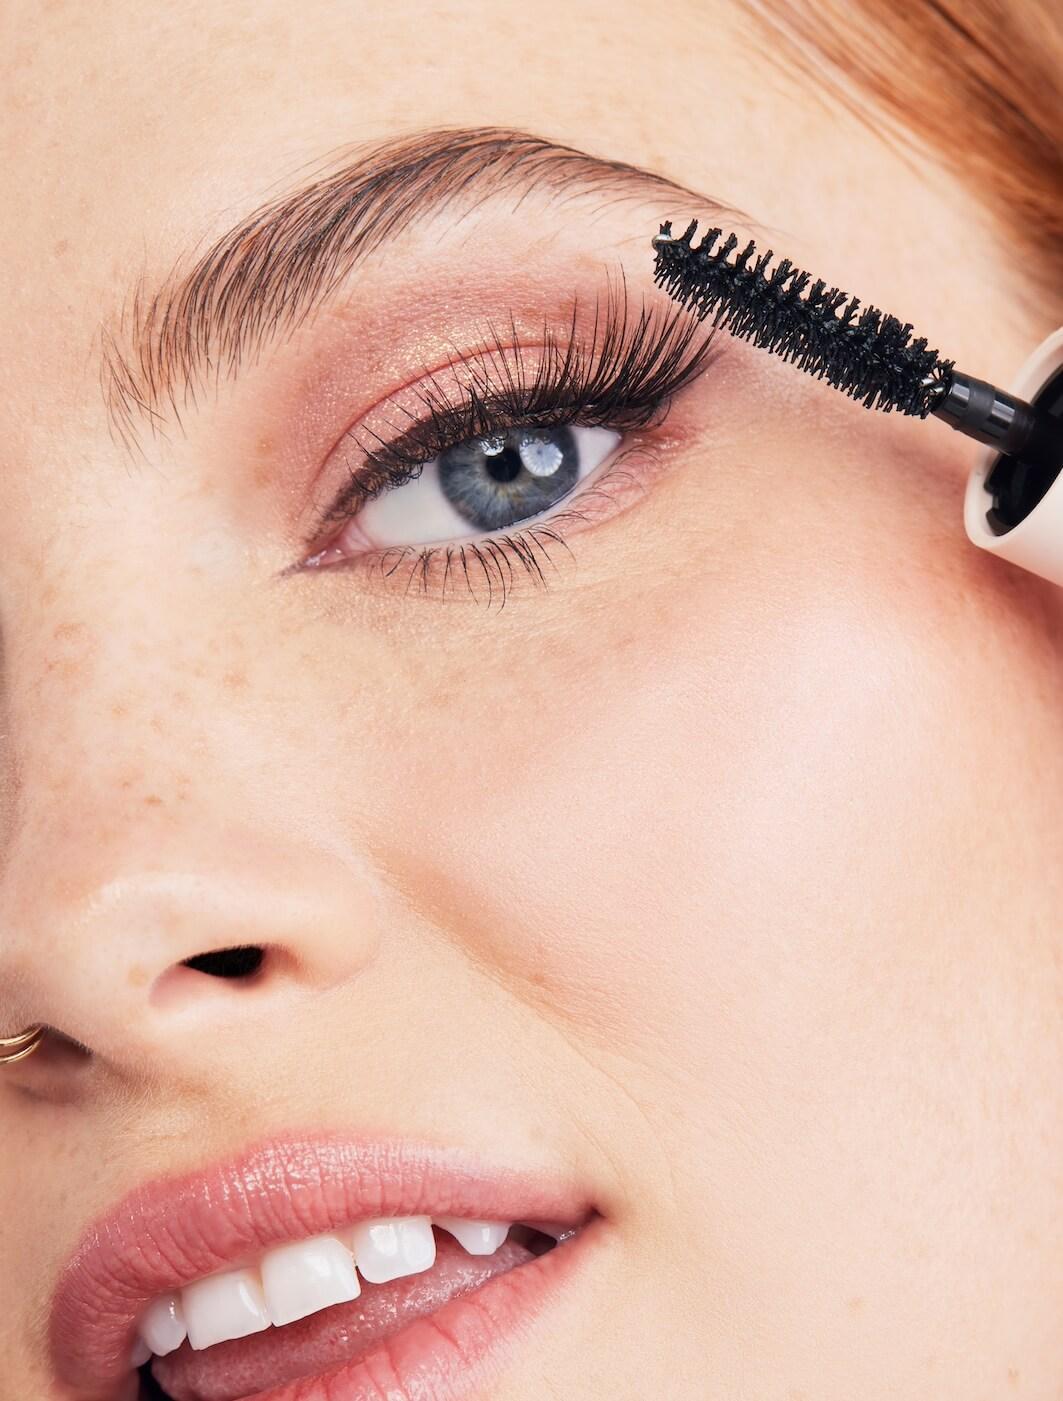
11. Swipe on Mascara
Makeup artists usually apply mascara a bit differently than us normal people. If you often just layer it on, try this pro trick from Maulawizada. “After curling the lashes, I wiggle the mascara at the root of the lashes and work it to the tips,” he says. This creates a full, dark lash line at the base of the lashes. There are tons of different mascara types to choose from, so pick what benefit you’re looking to achieve, and go from there. Looking for extra length? You’lll love tubing mascara. Want more volume? Then a fiber mascara will be your jam. Spending a lot of time in the heat or by the pool? Waterproof mascara is a total must!
12. Stick on Some False Lashes (Optional)
If you’ve recently spent any time on social media (and who hasn’t?), you’re well aware that false lashes are bigger and fuller than ever. While magnetic lashes have gained serious popularity in recent years, traditional glue-on falsies still reign supreme. Though this is what we consider an added bonus in a makeup routine, if you do indeed want to take this route, Bell breaks down step-by-step instructions for doing it effortlessly.
Start by applying eyeliner along the upper lash line. This will guide you and give a better finish to the final look. Use a pencil liner for a softer look, or a liquid liner for a refined look.
Next, curl your lashes. If you can, gently heat your eyelash curler with a hair dryer on very low heat in advance. This will provide a greater, longer-lasting curl.
Apply a coat of mascara.
Remove strip lashes gently with tweezers from the packet and measure them along the eyes. Cut the strip of lashes to fit your eyes (small sanitized nail scissors should do the trick).
Use a cotton swab to apply a thin layer of eyelash glue to the band.
The next step is very important: Go in with a little extra glue and add an extra blob on the inner and outer ends of the lash.
Then, wait approximately 30 seconds to allow the glue to get tacky in texture.
Place the eyelash as close to your natural lash line as possible.
Press down on the center of the lashes first, then the inner and outer corners.
Lastly, clamp your real lashes and the false lashes together with a lash applicator or tweezers.
MORPHE’s False Lashes in DTLA are a great starter set. Not only are they inexpensive, they also appear more on the natural side and are made by a reputable brand that influencers swear by. Added bonus? They’re vegan and cruelty-free.
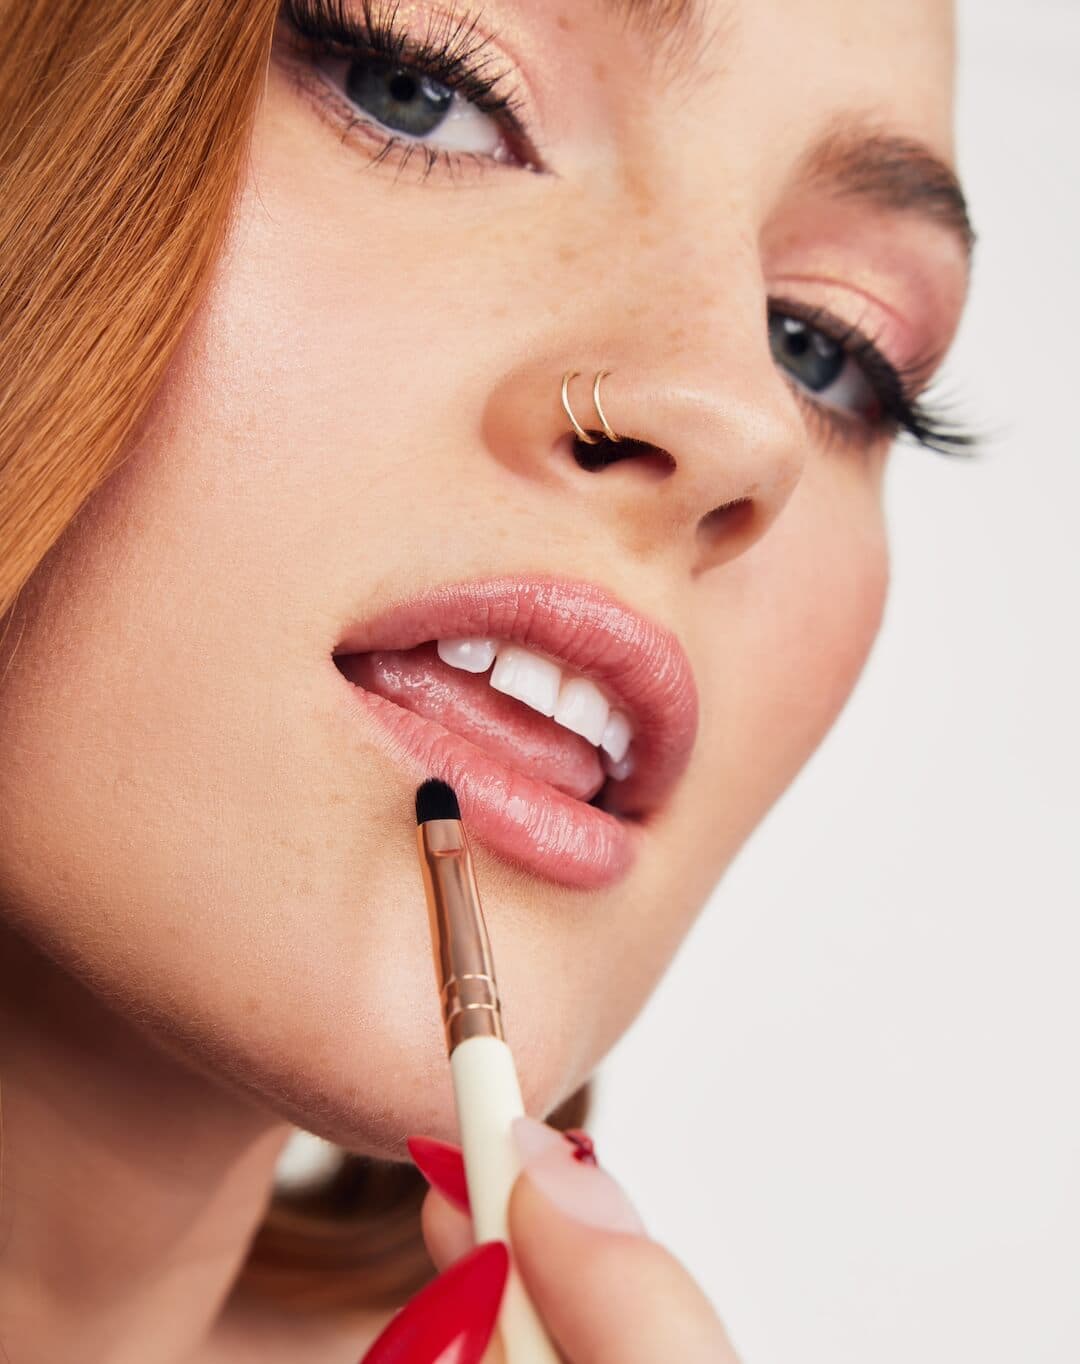
13. Line Your Lips
Applying lip liner can both contour your lips and make your lipstick last longer. Maulawizada prefers lining the lips to contour and then shading in the rest of the lips lightly. When lipstick is applied on top, it creates a plumping 3D effect. Plus, as the lipstick wears off, the liner shows underneath instead of bare lips.
We recommend a three-in-one lip liner like THRIVE CAUSEMETICS Lip Filler Long Wearing + Plumping Lip Liner in Ghizlan. This natural-looking, plum mauve shade looks gorgeous on all skin tones and the formula is truly unique. It contains hydrating and plumping ingredients to minimize the appearance of lip lines and keep both lipstick and liner from fading and feathering. The long-wearing, waterproof formula is also vegan and cruelty-free—so it basically has it all.
14. Paint on Your Lipstick and Lip Gloss
The order of lip products is what’s most important here. First comes lip liner, then lipstick, and then finish with lip gloss. Maulawizada applies lipstick either right from the bullet or with a lip brush, lining the lips and then filling them in. ILLAMASQUA Antimatter Lipstick in Midnight is the perfect semi-matte, semi-satin lipstick in a true red.
For a fuller pout, add lip gloss on top, right in the middle of your lips. “Make a kiss pout, then tap the color to the lips,” Maulawizada says. If you’re going for a more laid-back look, just apply lip gloss all over the lips with the doe-foot applicator.
15. Set Your Makeup
After all that work, you’ll want to set your makeup look with setting powder, setting spray, or both to maintain flawless-looking makeup all day. Your formula of choice will depend on your skin type and how long you need your makeup to last. Maulawizada likes using a velour puff saturated with setting powder, but you can also use any fluffy brush.
“Work the product into the puff and tap off any access on the back of the hand,” he explains. “Then, roll the puff where you want to set your makeup until you reach a desired matteness.” Think about where you’re most oily or where your makeup creases, such as under your eyes and around your T-zone. The BELLÁPIERRE COSMETICS Banana Setting Powder in Medium has a yellow tone to diminish the look of dark circles and even the skin tone as it creates a crease-proof finish.
If you prefer your skin to look less matte and more natural, setting spray is a great option either on top of powder or on its own. The COVER FX High Performance Setting Spray is a stellar alcohol and fragrance-free formula that sets makeup for up to 24 hours (seriously!). It contains fermented algae extract to help defend your skin against free radicals and environmental pollutants, so it’s basically like skincare as well. Who doesn’t love a two-for-one?
Ready to level up your makeup routine with products curated just for you? Take our Beauty Quiz now to get started with your own IPSY beauty subscription. Already an IPSY member? Refer your friends to earn points, which you can use toward products. Either way, don’t forget to check us out on Instagram and TikTok @IPSY.
Like this article? Share it with your friends by clicking the icons below!