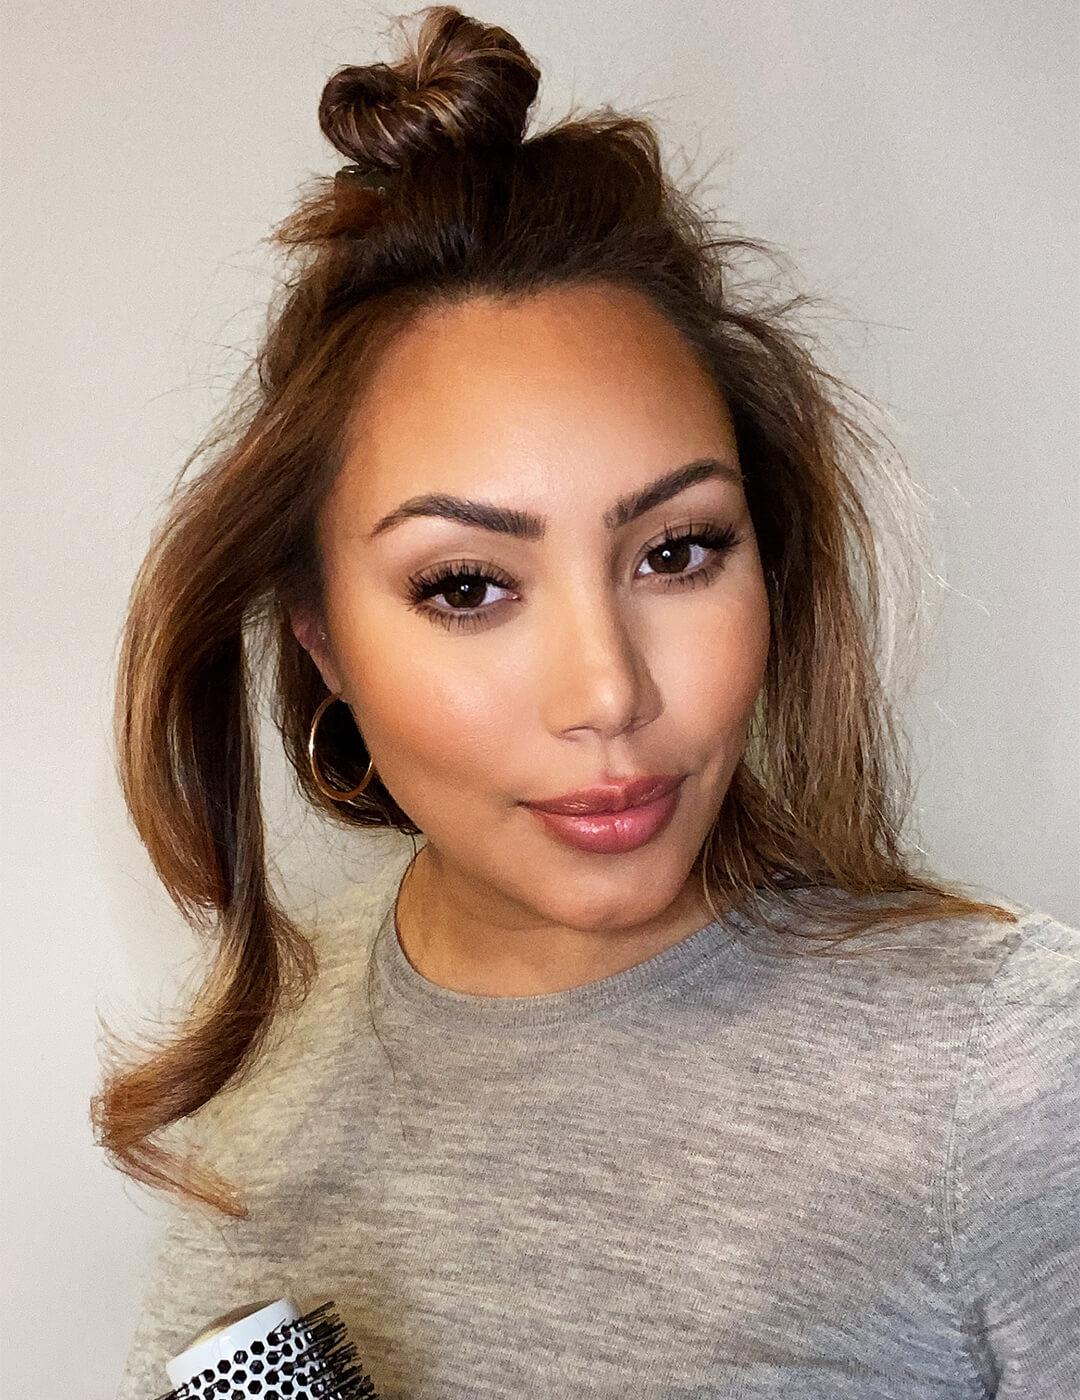
9 Expert Tips That Will *Actually* Make At-Home Blow-Outs Easier


Maddie Aberman

There’s a reason the concept of blow-dry bars has blown up in recent years. For starters, blow-drying your own hair is seriously time consuming, and second, it’s an art. Few people can do the at-home blow-out justice, and even if you’ve got the skills, you probably don’t have the time to do one on the reg—which is why we tapped two talented hair pros for help. Keep scrolling for 9 expert tips to make your at-home blow-dry so much easier.
It's about glam time you treated yourself.
Join IPSY

MEET THE EXPERT
Cynthia Alvarez is a celebrity hairstylist with advanced extension and wig training.
Meri Kate O’Connor is a Los Angeles based colorist with extensive experience in extensions and keratin treatments, too.
1. The prep work matters.

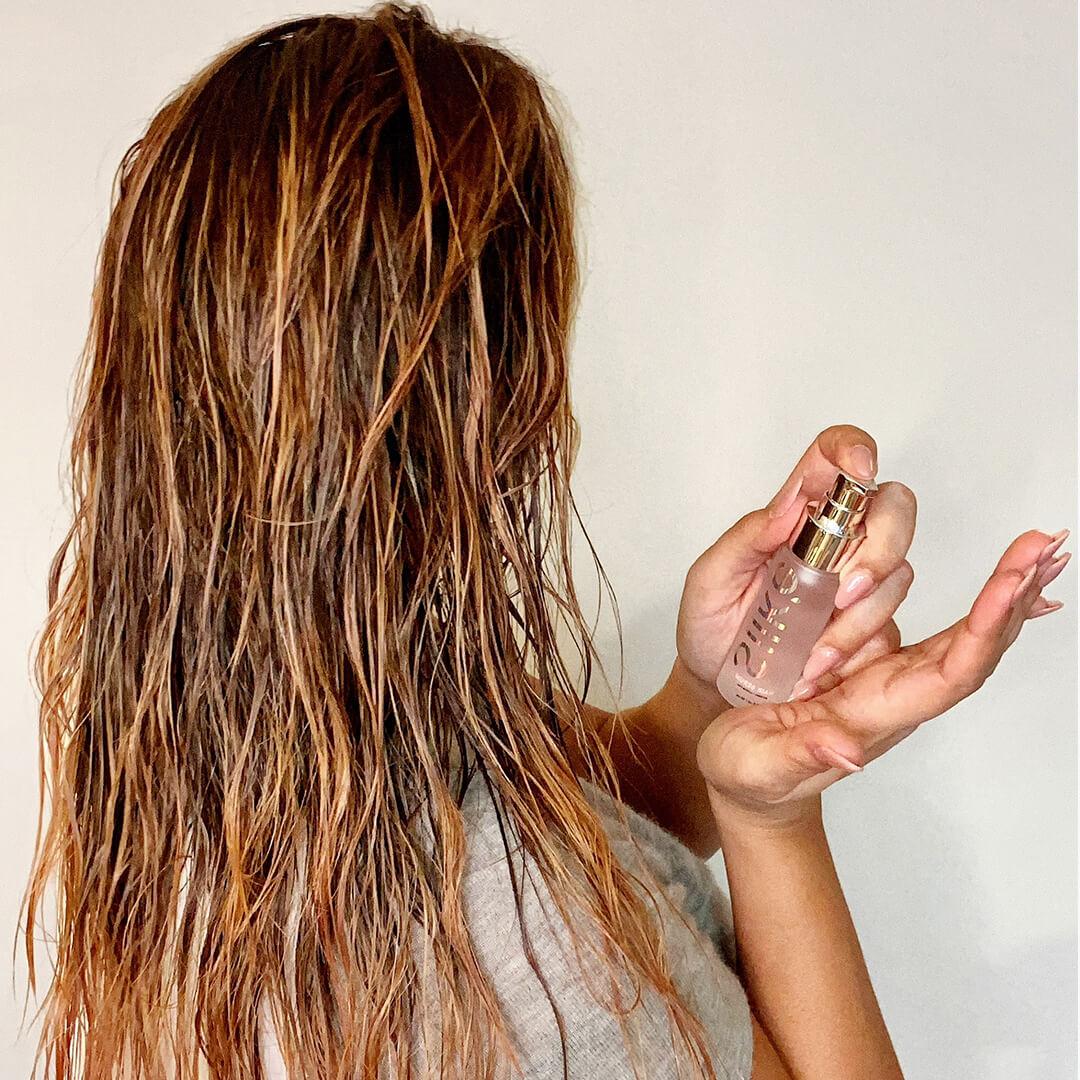
Fact: Styling starts in the shower. If it’s volume you’re after, hairstylist Cynthia Alvarez recommends cleansing and conditioning with a volumizing formula. Once you’ve towel dried your hair (try using a microfiber towel or a cotton T-shirt to minimize frizz), work a blow-dry cream from mid-shaft to ends for a smooth, silky finish. “Then comb it through to ensure the product is well distributed,” says colorist Meri Kate O’Connor.
If you have fine hair, make sure to avoid your roots with the product, as it can weigh your hair down. If you have thick curly hair, on the other hand, O’Connor recommends adding the product straight to dripping wet hair (no towel-drying for you!), then skipping the next step. “I wouldn't pre dry with a towel or with the dryer,” says O’Connor. “You will be able to get a smoother, frizz-free blow-dry that way.”
2. Rough dry first (unless you have curls).

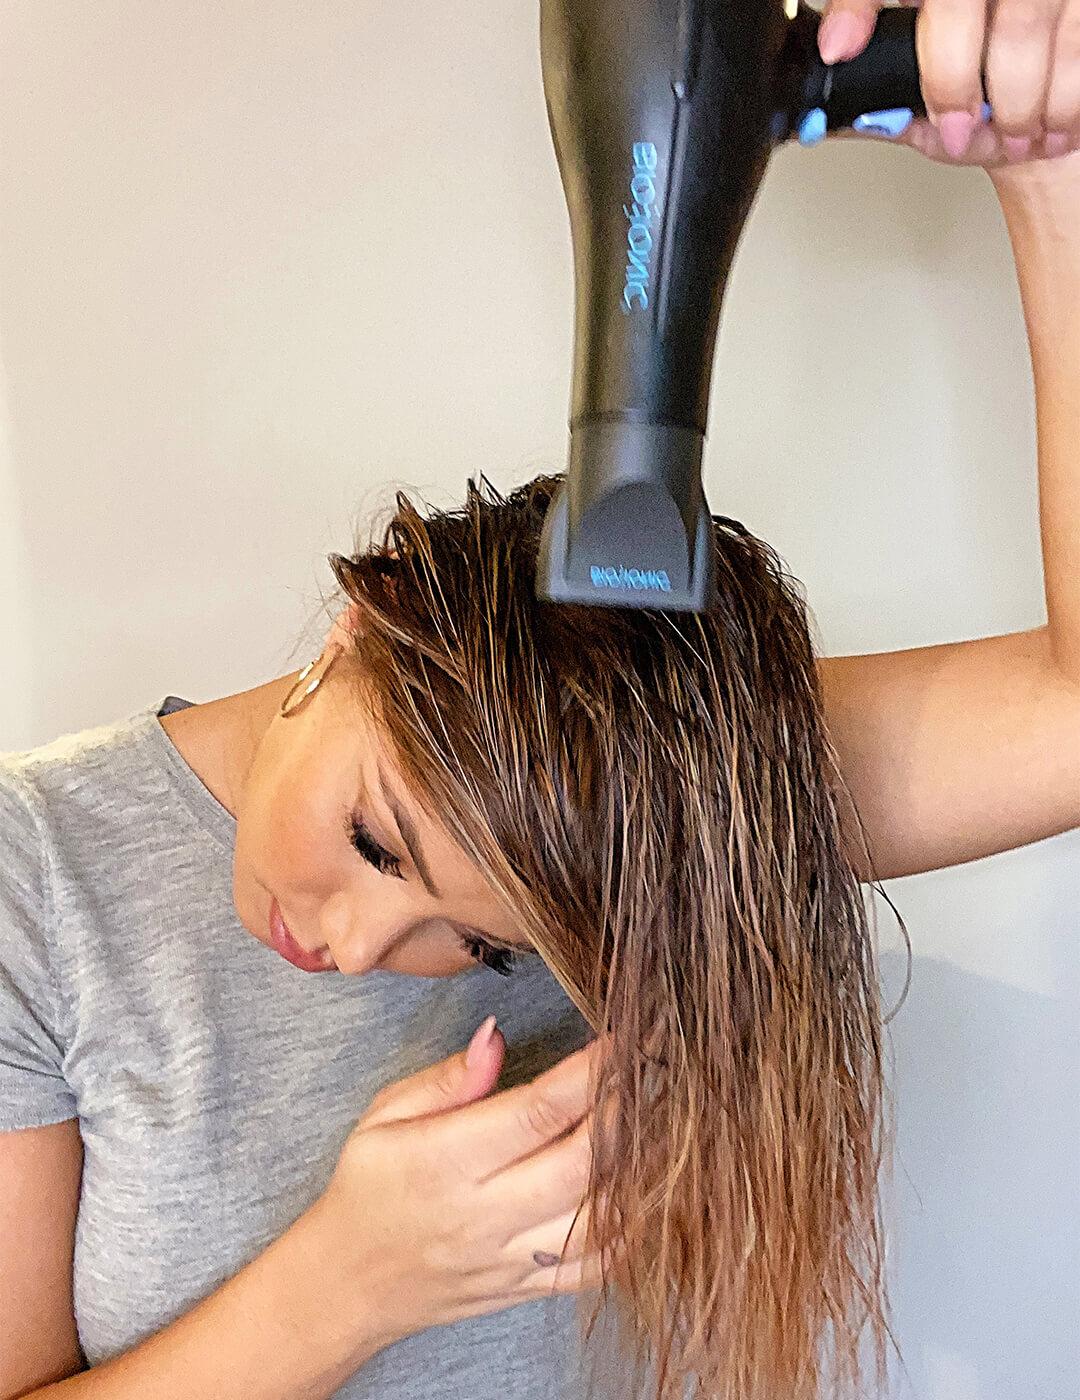
Before you reach for your round brush, rough dry your hair until it’s about 70 percent dry. “Doing so will cut styling time down and also save your arms from exhaustion,” says Alvarez. Not to mention, it will save your hair from extra heat just to get all of the water out, adds O’Connor. Want even more volume? Flip your head upside down during this step to encourage your roots to lift up away from your scalp.
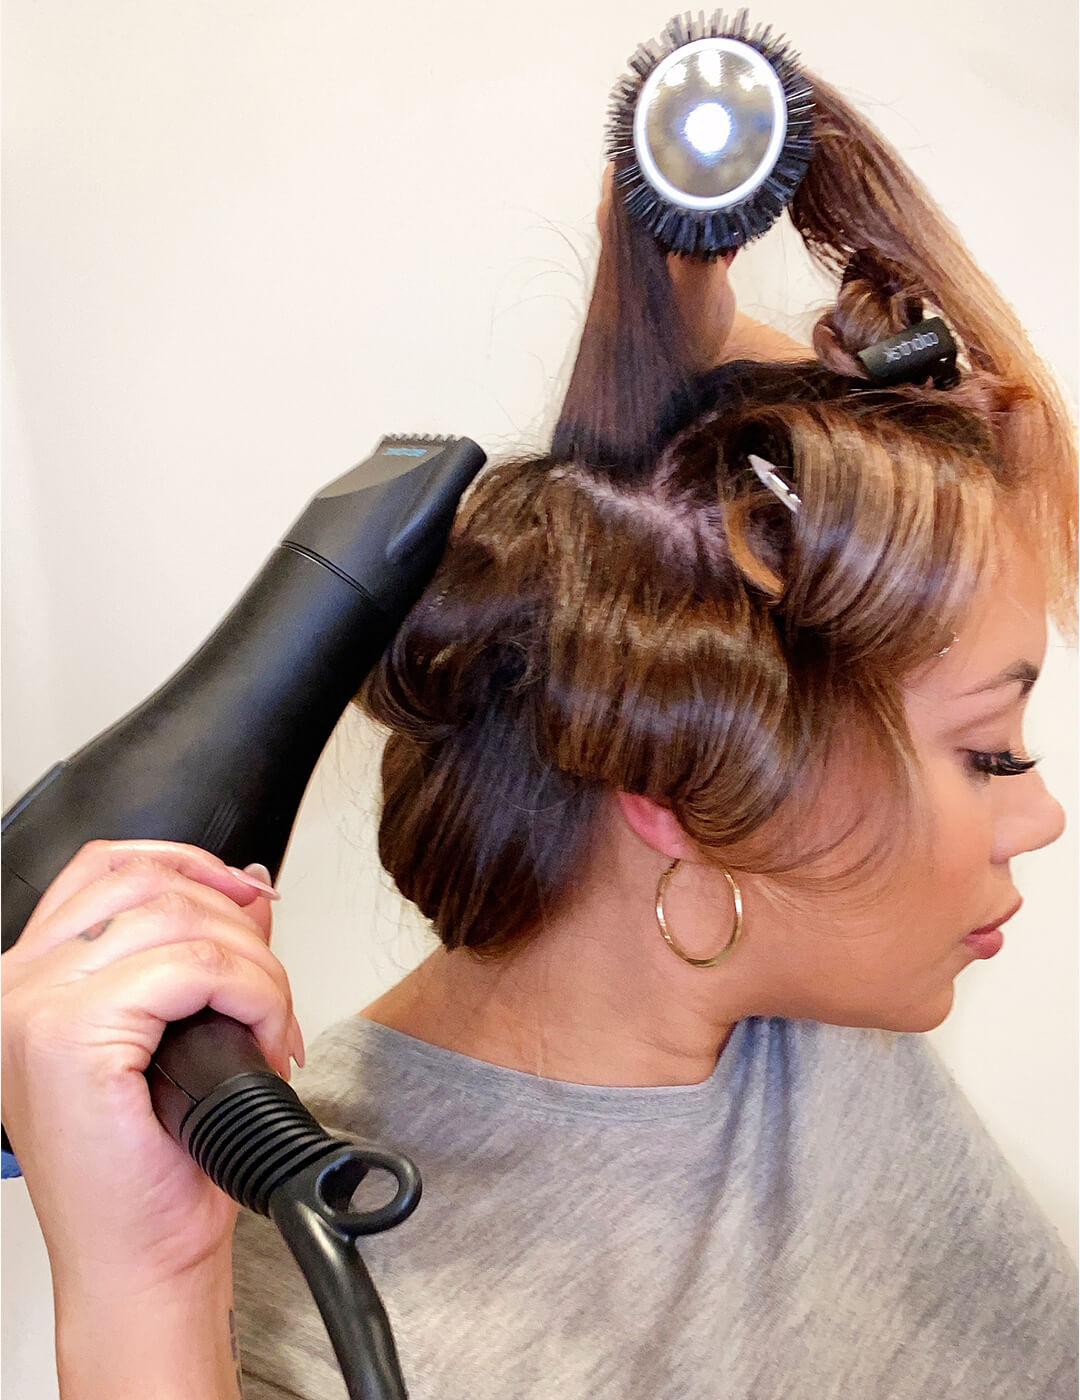
3. Work your way from the bottom up.
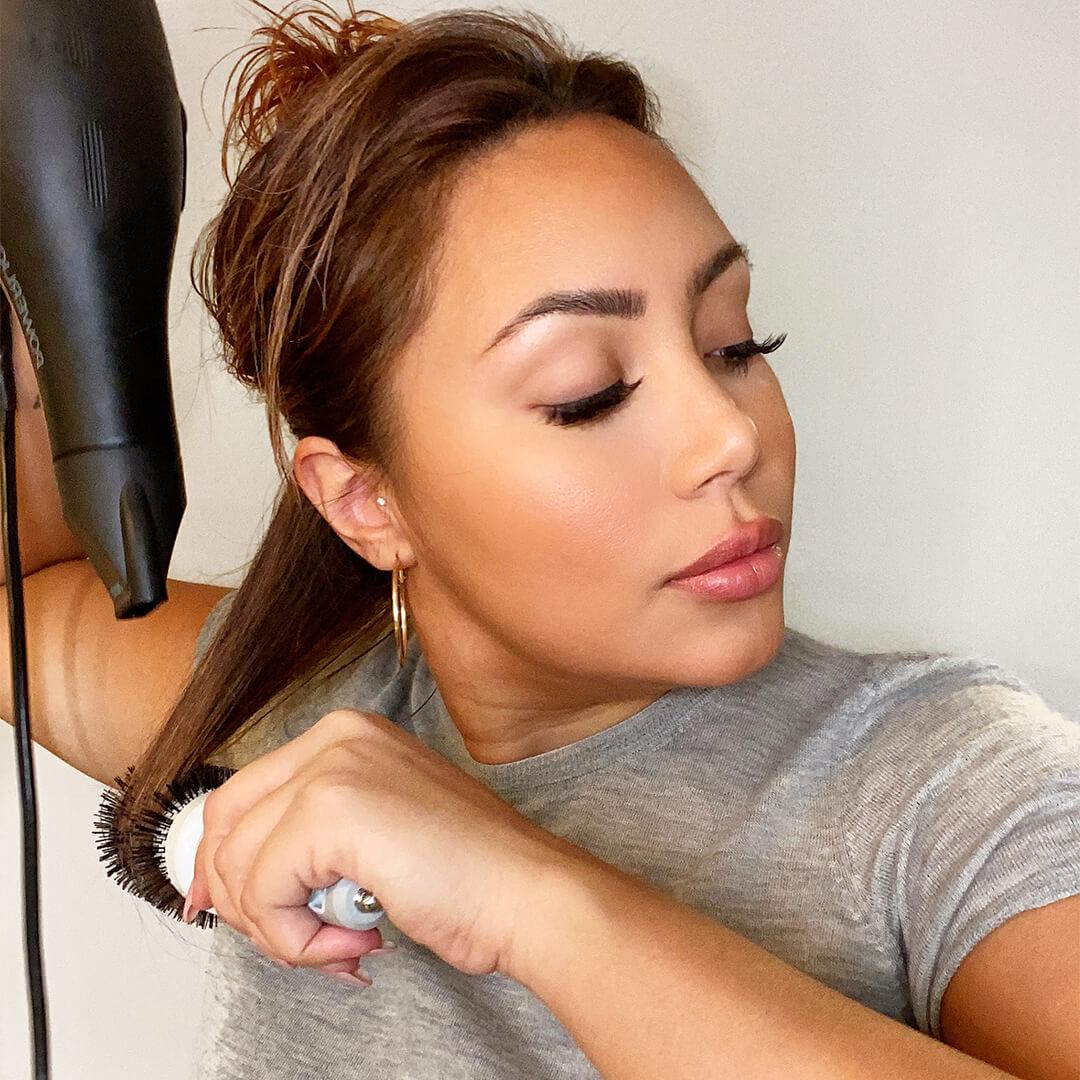

Clip up the top section of your hair (Alvarez recommends sectioning off from around your ears up), then begin drying with a round brush, working in two-inch sections. “Hold the blow-dryer an inch away from your hair,” says O’Connor. “Don't hit the nozzle onto the brush as that direct heat can cause damage to your hair.”
4. Cool your hair down before you release the round brush.

You know that blue button on your blow-dryer you’ve probably never used? Yep, that’s called a cool shot. And any hairstylist will tell you that it is one of their top pro secrets. As your dry hair is still wrapped around your round brush, hit it with a cool blast. “A shot of cool air will allow the curl and volume to set,” says Alvarez.
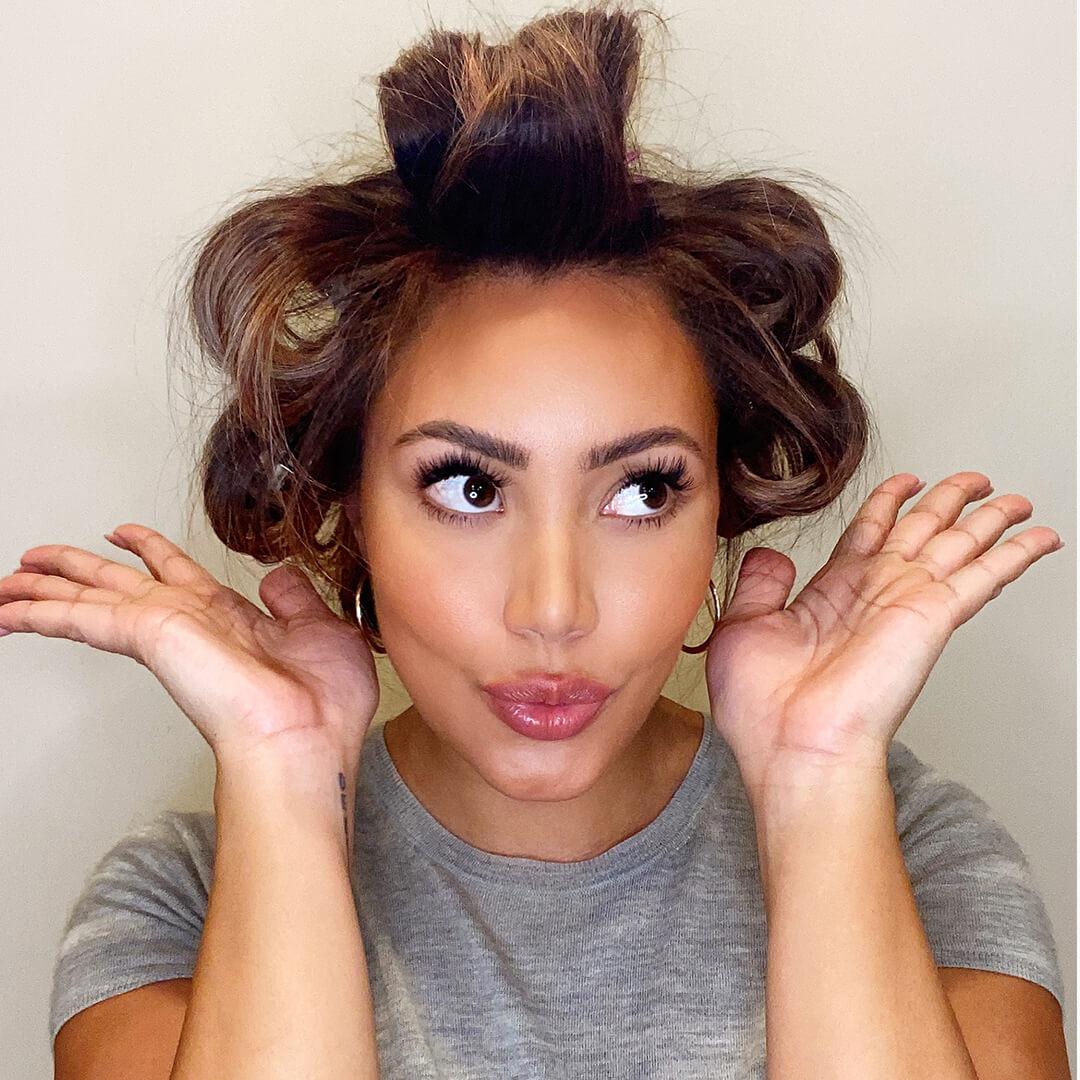
5. Pin up sections as you go.
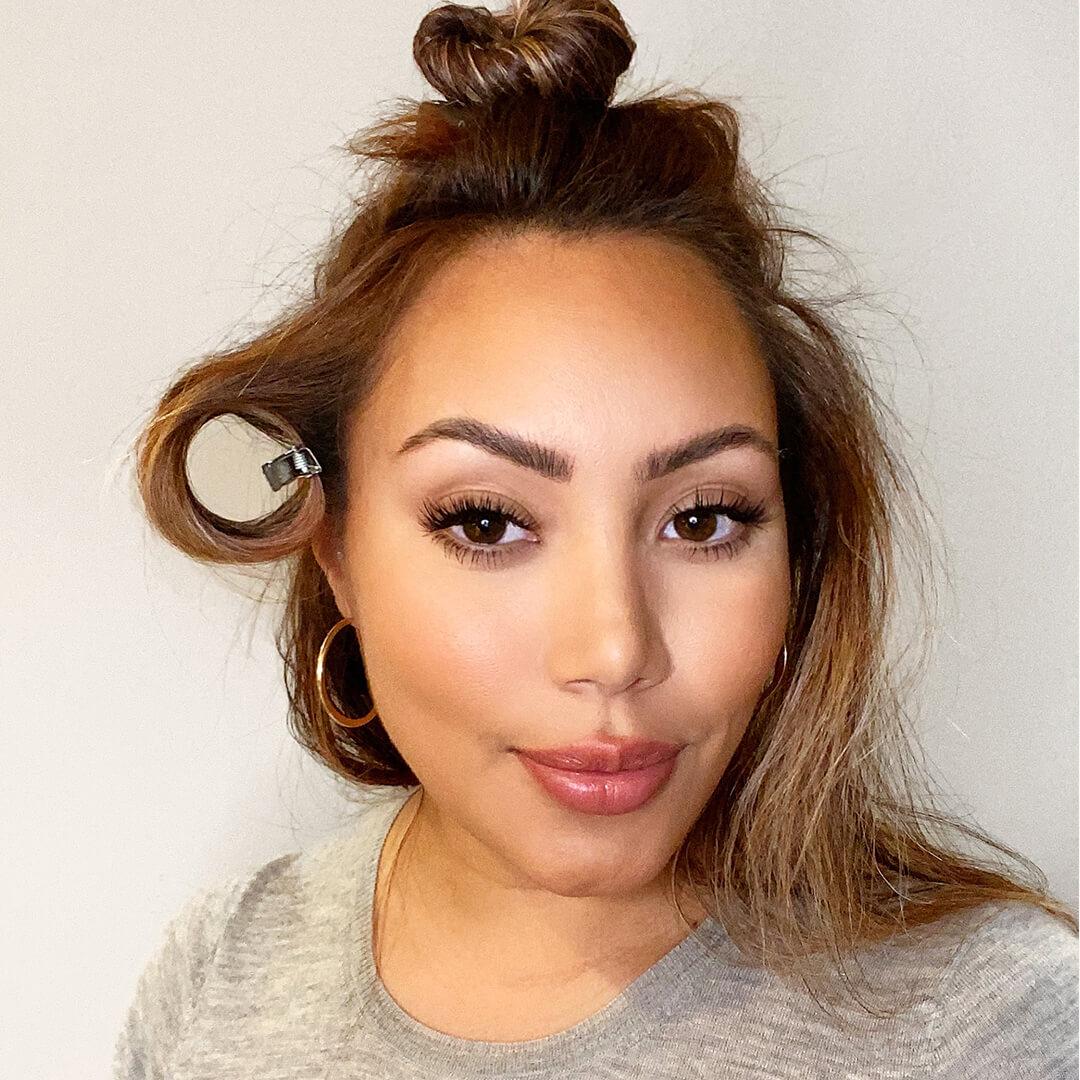

A foolproof way to ensure tons of body is to wrap up each section while you finish the blow-dry. You can use those long silver clips (a.k.a. duck bill clips) if you have them, but bobby pins will work just as will. And if you’re having a hard time reaching the back sections, O’Connor recommends pulling them to the sides of your head to make access easier.
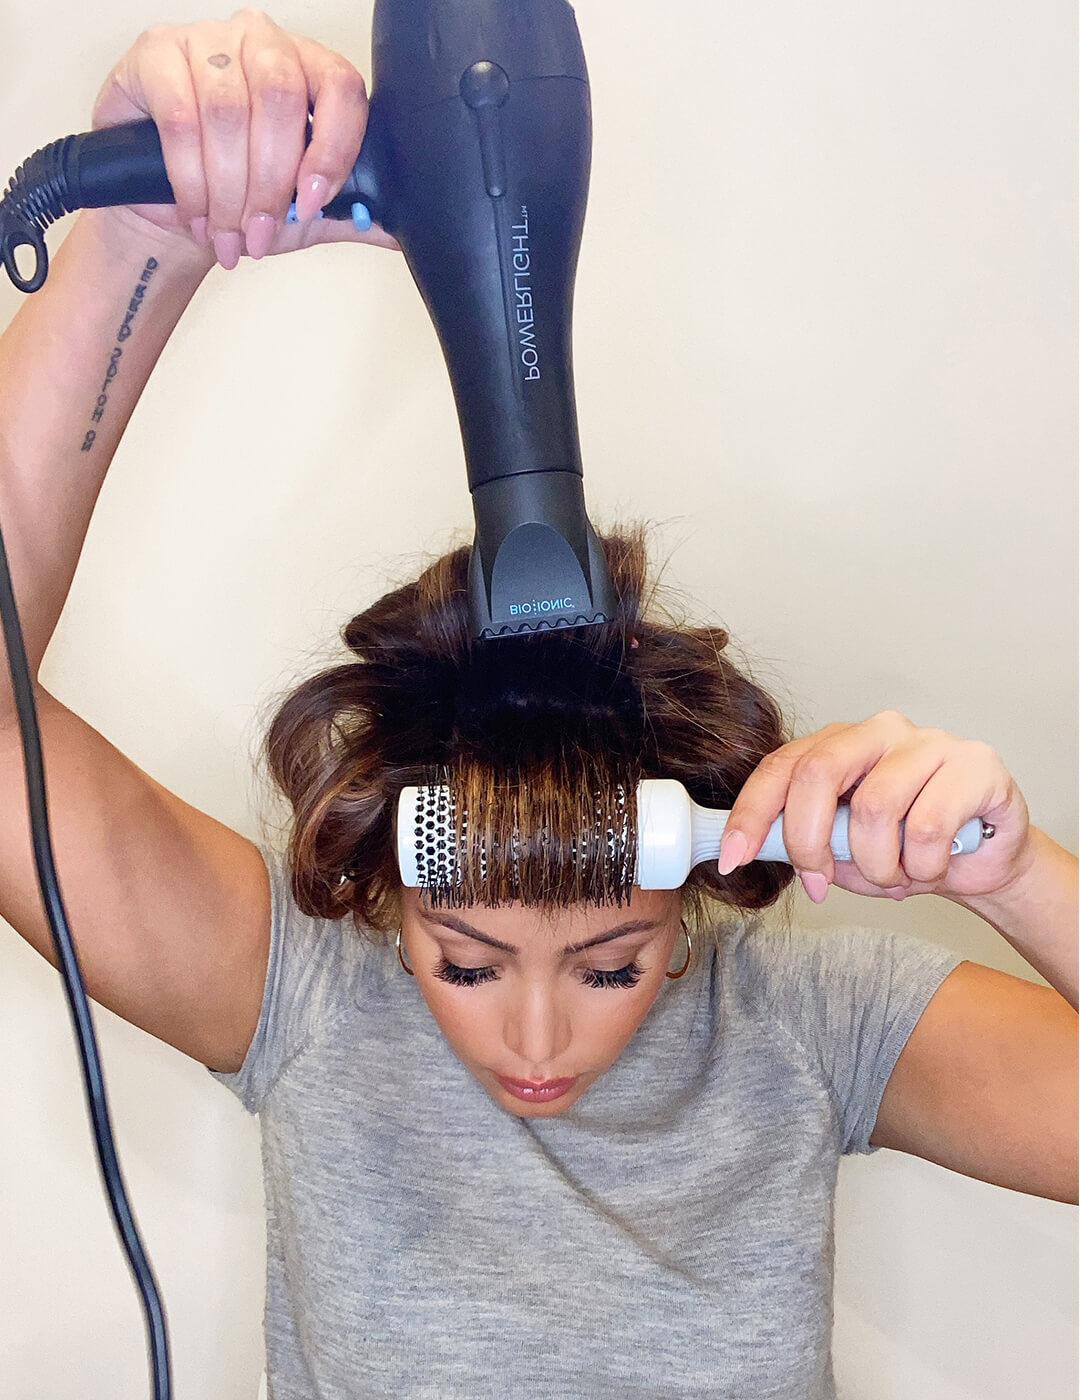
6. Score lift at your crown.

We’ve said it once, and we’ll say it again: Volume is the name of the game when it comes to scoring a salon-worthy blow-out at home. The most important area to get that lift is in the crown section (the section of hair right on the tip of your head). “To achieve that volume, lift the crown section and blow-dry the roots in an upward motion,” says Alvarez.
7. Get those face-framing pieces.

You know those curtain bang-like swooping front pieces you get at the salon but just can’t seem to nail at home? Alvarez has a trick for that. “Dry the front section by blow-drying the hair towards your face,” says Alvarez. “Then switch to drying it away from your face.”
8. Let it set.

Here’s where we test your patience. Once you’ve dried and pinned up each section, give your hair 10 minutes to fully cool before you even think of unclipping anything. This will make sure all your hard work stays in place all day. So use this time to do your makeup, brush your teeth, brew some coffee, or scroll through TikTok (we recommend brushing up on more beauty hacks here!).
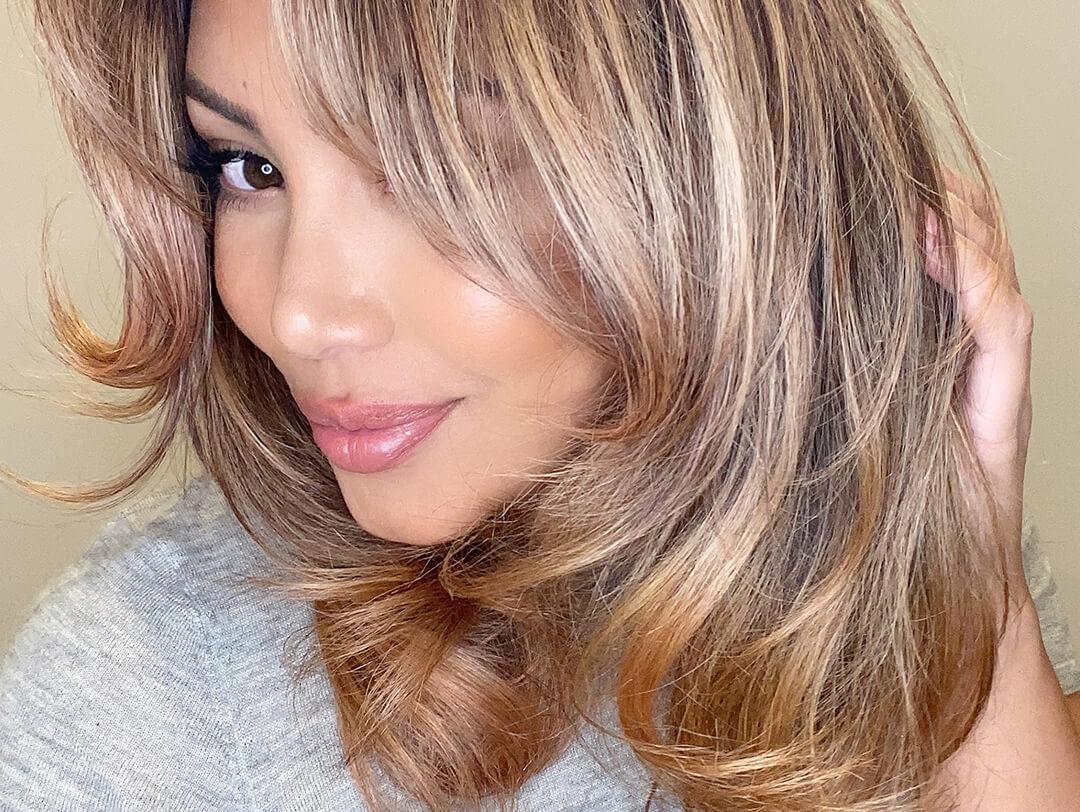
9. Add some finishing touches.

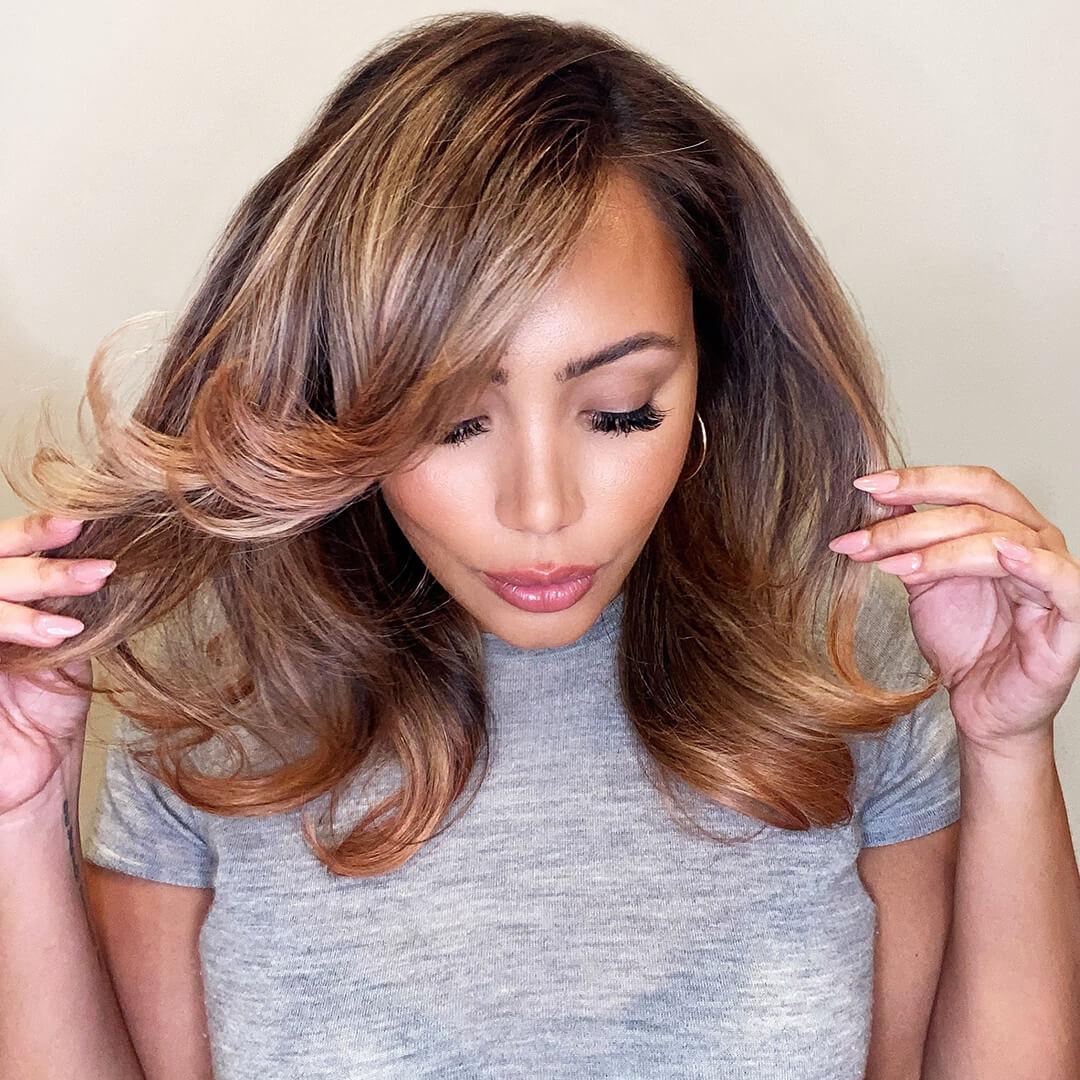
You now have our permission to let down your hair! Don’t freak out—it will probably look a little crazy until you do these two steps. First, rub a pea-size amount of a serum (we love SLEEK'E HAIR Silk'e Repair Therapy Hair Serum) between your palms, then work it through your hair starting at the ends. Next, “shape your hair into place by using a paddle brush or running your fingers through your hair for an effortless finish,” says Alvarez.
Looking for more at-home beauty tricks? We got you! Take our Beauty Quiz now to get started on your very own IPSY Glam Bag. Already an Ipster? Refer your friends to earn points, which you can use toward products. Either way, don’t forget to check us out on Instagram and Twitter @IPSY.
Like this article? Share it with your friends by clicking the icons below!
Liked this post? Share!
Related Stories


Hair
Thinking About Cutting a Bob This Summer? Start Here!
5 min read


Hair
Are You Leaving Your Conditioner on Long Enough?
4 min read


Hair
E.L.F. Just Entered the Hair Chat—Here's Everything in the Collection
3 min read


Hair
Heat Wave? These 12 Summer Hairstyles Are the Move
5 min read


Hair
The Best Bob Cut Haircuts for Every Face Shape, Hair Texture, and Styling Routine
7 min read


Hair
Ultra-Long Hair Is Everywhere Right Now—Here’s Why
3 min read


Hair
13 Blonde Balayage Looks That Prove the Hair Color Trend Is Here to Stay
3 min read

Hair
Brown Hair Color Guide: How to Choose the Right Shade, Undertone, and Style for You
10 min read

Beauty Picked Just for You
Get 5 products worth up to $70
Exclusive access to epic deals up to 80% off
Starting at just $15/month. Cancel anytime.