Master Mascara Application With These Game-Changing Tricks


Ashley Locke


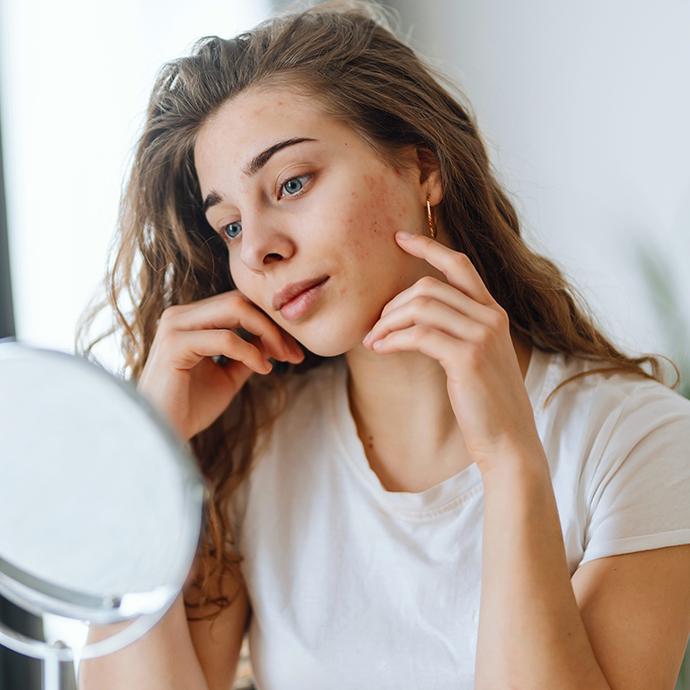
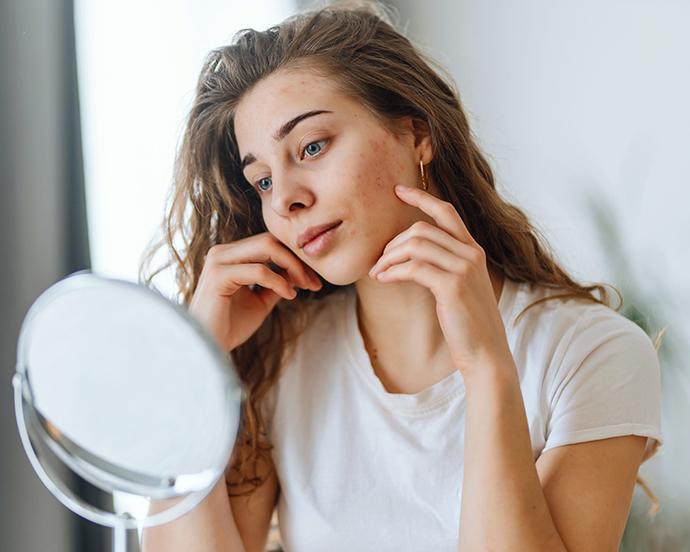
Mascara is a must in any makeup routine. Whether you’re hoping to achieve a more natural makeup look or you want to express a flair for the dramatic with something that shows off your eyes, mascara is the makeup product you can’t skip out on.
We’ve even seen numerous trends over the past few years highlighting the staple product. From clean girl aesthetics emphasizing barely-there eye makeup to color mascara options taking over (sorry, classic black mascara), mascara isn’t going anywhere anytime soon—which is why you need to know how to apply mascara to keep up with these trends and create an eye look that dazzles. Below, makeup artists and beauty experts share their pro hacks for proper mascara application so you can avoid flakes, clumps, and everything in between. Find all the makeup tips you need below to make your lashes look flawless.
It's about glam time you treated yourself.
Join IPSY

MEET THE EXPERT
Sarah Biggers-Stewart is a makeup artist and the founder and CEO of CLOVER BY CLOVE + HALLOW.
Alex Lang is a licensed esthetician and the director of global education for COLORESCIENCE.
Emily Gray is a makeup artist specializing in beauty, editorial, celebrity, male grooming, and commercial work.
A Step-by-Step Guide to Applying Any Mascara
We think of mascara as the finishing touch to your makeup routine—it comes after eyeshadow, eyeliner, and any other eye makeup you are using to complete your look. But what if we told you it could be your one and only secret to a natural look? Adding a touch of mascara is always our go-to errand or Saturday morning brunch look; it’s natural and effortless, only taking a couple of minutes to perfect.
Before you start swiping, it’s time to pick your product. There are endless types of mascara formulas to choose from for you and your lashes. When it comes to choosing, makeup artist Emily Gray says it’s all about preference and outcome: “For someone who already has a lot of lashes, I usually choose a more defining mascara. If someone has sparser lashes, I prefer a more volumizing one. If someone has really blonde hair and/or light eyes, I like to choose brown mascara.”
Gray is a fan of the CATRICE COSMETICS Hyper Lash Mascara, because “it offers definition, length, volume, and curl in a vegan formula at an affordable price.” Esthetician Alex Lang recommends the COLORESCIENCE Total Lash® Serum Mascara because “it conditions with lash nourishing ingredients, is clinically shown to support growth of natural lashes, and delivers rich color from iron oxide minerals.”
We have some suggestions of our own, too. Are you vying for a volumizing mascara? Try the WANDER BEAUTY Mile High Club™ Length and Define Mascara. Looking for a lengthening mascara? Go with the BLINC Lash Extension TUBING™ Mascara. Going crazy trying to find a curling mascara? The KEVYN AUCOIN The Curling Mascara is right up your alley. Once you’ve determined the right mascara for you, follow the below mascara tips for a seamless application that doesn’t smudge, flake, or clump.
Step 1: Curl Your Lashes for Maximum Impact
Before applying mascara, use an eyelash curler to lift and lengthen lashes. This will allow your mascara to adhere better to your eyelashes, in addition to fanning each individual lash out a bit. It’s also important to note that you should use an eyelash curler before you apply your mascara. “I’m certain that we have all seen those videos of an innocent person accidentally taking off all their lashes with a lash curler (and mascara still wet),” says Gray. “Please, curl your lashes prior to putting on mascara.” The TRÈSTIQUE Good Vibes Mascara + Eyelash Curler comes with a lash curler already built in, so you don’t have to worry about using one too many products. We love a two-in-one.
How to Curl Your Eyelashes, Step by Step
Not sure how to curl your eyelashes? This quick guide will take you through all the steps you need to follow to ensure you do it right.
Find the Right Eyelash Curler for Your Eye Shape
There is no one right eyelash curler for everyone. Those with rounder eyes need something with a more dramatic curve. Those with monolids or almond-shaped eyes should use a curler with a softer curve.Prep Your Eyelash Curler
Make sure the pad on your eyelash curler is fit for use. Maybe even give your curler a wipe-down before you put it on your lashes, especially if you haven’t cleaned it in a while.Position the Curler at the Base of Your Lashes
Keep your eye about halfway open and position the curler at the base of your lashes. The goal is to get as close as possible without grabbing any of your eyelid in the clamp.Squeeze Gently and Pulse
Give the curler a gentle squeeze once it’s in position to ensure your eyelid doesn’t get caught in it. If it’s all good, go ahead and clamp down again, pulsing a few times to create the curl you desire.Tilt Your Lashes for Even More Curl
This is especially necessary for those with straight lashes. Gently draw the lash handle up and toward you to create a more intense curl.Go Over Your Lashes With One Final Curl
Before you apply mascara, run your curler through the entire length of your eyelash to create the most natural-looking curl possible.
Step 2: Use Eyelash Primer for Skincare Benefits and to Create Definition
Lang shares that “a lash primer is a great option to condition your lashes and create a smooth base for better length and volume. Think of it as skincare for your lashes.” She and Gray stress that a primer is a nice-to-have but isn’t 100% necessary, though Gray points out that those with thick lashes will receive more definition when using a primer to fan out their eyelashes.
Similar to us, Lang also appreciates a two-in-one product. So, if you’re looking for a mascara that provides skincare benefits and will coat your lashes with color, the PERRICONE MD No Makeup Mascara is exactly what you need.
Step 3: Scrape Off Excess Product So You Don’t Go in With Too Much
Before you apply any mascara to your lashes, you want to ensure you have the right amount of product on your spoolie. Gray says, “I like to take the wand and scrape the excess product off. I prefer to work in thinner layers and build up the lashes.” Dip your mascara wand into the product and scrape off what you don’t need onto the top of the mascara tube so you don’t end up with too much product.

Step 4: Apply Mascara on Your Upper Lashes to Start
You should apply mascara to your upper lashes first before moving onto your bottom lashes. The experts all agree to start at the base of your lashes. “Always start with the base of your lashes, then wiggle the wand side to side, then pull upward in smooth strokes. This anchors the mascara and gives a natural lift with every coat,” notes Lang.
Depending on what look you’re hoping to achieve, we have a few tutorials you can follow.
How to Layer Mascara for Volume
Curl Your Lashes
We know this was mentioned, but we want to reiterate how using an eyelash curler can help you achieve longer, more voluminous lashes instantly.Start With a Lengthening Mascara
To give your lashes some extra length, start with a lengthening mascara like the BEAUTY VAULTE Lengthening Mascara. This will help cheat extra volume for a va-va-voom look.Work the Mascara in Layers
“The secret to fluffy, full lashes? Thin coats,” emphasizes Lang. Work in thin layers, making sure to wipe off any excess mascara so you don’t create a clumpy mess.Give It Some Time Between Layer Applications
Grays says to “make sure to give a little bit of drying time in between each layer of mascara. This is particularly important if you are going for a more voluminous mascara look.”Finish With a Volumizing Mascara
Once your layers are set with the lengthening mascara (we suggest one to two coats), go in with a volumizing mascara to pump up the volume. We love the BENEFIT COSMETICS BADgal Bounce Volumizing Mascara in Pump’d Up Black because it creates sky-high lashes without weighing them down.
How to Build Length With Mascara
Start With an Eyelash Curler
OK, OK, we know you get it by now—but it bears repeating, because this step will really help extend the length of your lashes, especially for those of you with short, straight eyelashes.Consider Trying an Eyelash Primer
This isn’t a necessity, though it can help “grow” the look of your lashes. The M·A·C COSMETICS Legit Lift Lash Primer is a great option to add length and lift while reducing smudging and flaking.Choose Your Lengthening Mascara
The options are endless when it comes to lengthening mascara, so the choice is ultimately yours. We like the natural lift that MAKE UP FOR EVER The Professional 24HR Double-Ended Lifting & Volumizing Mascara in Black provides. The ONE/SIZE Fantasize Lifting & Lengthening Mascara is another one we love, given that it offers conditioning benefits for your lashes.Apply the Mascara in Layers, Focusing on the Tips of Your Lashes
Wiggle and sweep the mascara applicator through your top lashes, ensuring you coat every lash, while also focusing on the tips. This will create the illusion of length.
Step 5: Finish Your Mascara Application on Your Bottom Lashes
With your top lashes coated, you can now use mascara on your lower lashes. When it comes to your bottom lashes, you’ll want to be extra careful not to use too much product and create clumps. Because your bottom lashes are generally more delicate than your upper eyelashes, any clumpy sections will be especially apparent. To avoid this, use the tip of the wand and apply your mascara just at the roots of the lashes, wiggling the bristles back and forth for an even coat. Or, pick up a mascara that is meant for bottom lashes. They typically feature a tiny wand for coating the finest eyelashes you have without creating a mess or dispensing too much product. Ipsters swear by the HUDA BEAUTY 1 Coat WOW! Mini Mascara, because it leaves just the right amount of product on your lower lashes.
How to Apply Mascara to Your Bottom Lashes Like a Pro
Applying mascara to your bottom lashes requires a few steps to ensure you nail it on the first try and avoid unnecessary smudges.
Prep the Area With Skincare and Primer
To ensure the under-eye area is smooth, apply a moisturizer to the area. This will also aid in the clean-up process, should any mascara get stuck down there. Also, be sure to use a primer on your lower lashes if you’re hoping to achieve extra length. This step isn’t required, though it can help those who have short lower lashes.Choose the Best Mascara for Your Bottom Lashes
There are smaller, more delicate mascara brushes that perfectly work for your lower lashes. You can use a mascara specific for your lower lashes, or find a spoolie that’s a bit thinner to achieve fanned-out lashes.Work in Light Strokes
Apply your mascara on your lower lashes in light, sweeping strokes. Wiggle from the base of your lashes to the tips to coat them fully.Clean Up Any Mistakes
If there are any stray mascara marks (which is totally normal!), wipe them away using a cotton swab dipped in micellar water. You can go in with a makeup remover as well; it’s completely up to you.
Step 6: Comb Through Any Clumps
Clumps happen, especially if you apply one too many layers. The good news is, they’re easy to work through. Grab a clean spoolie or a lash comb and brush them through your lashes to get rid of clumps.
How to Avoid Clumpy Mascara in the First Place
To prevent clumps from happening in the first place, we have a few tricks you can follow.
Scrape off Excess Product
Less is more. You don’t need as much mascara as you think, so always be sure to wipe off any excess product on the inside of the tube so it doesn’t end up on your lashes. “I find using too much product right off the bat causes really clumpy lashes, so make sure you’re taking off the excess product,” says Gray.Go in With Thin Layers
It’s easier to build than it is to take away. Work in thin layers to avoid unnecessary clumping. You can always go in with another layer if you want more drama.Use a Lash Comb to Fan Out Your Lashes
Gray is a fan of a lash comb tool to get rid of any stubborn clumps. “Gently comb through lashes to get rid of any clumps,” she says. “I would just advise being careful, as lash combs are metal and sharp. Do not stab yourself accidentally!”Try a Clean Spoolie to Separate the Lashes
Lang likes a clean spoolie to separate the lashes. We like using the other end of the MO BEAUTY Divinely Defined Precision Brow Pencil & Brush for this.
Step 7: Clean Up Any Smudges Around Your Eye Area
Mascara can be messy and sometimes smudges onto the eyelids and the skin around the eye. It happens to the best of us (even professional makeup artists!). Luckily, it’s super simple to fix. Remove any leftover product with a gentle eye makeup remover—we love the MAKE UP FOR EVER Gentle Eye Gel Waterproof Eye & Lip Makeup Remover for a powerful clean that won’t harm your skin or eyes. Gray says that if the mascara is dry, you can “take a clean mascara spoolie and flick the smudges off. If done correctly, this will not disturb any of the shadow, liner, foundation, or concealer under it.” Lang shares that “a cotton swab dipped in micellar water is your best friend for quick touch-ups without disturbing the rest of your makeup.”
7 Hacks for Upping Your Mascara Game
Now that you’ve got the basics covered, we’ve got a few game-changing hacks to create full, falsie-like eyelashes. Consider this your mascara cheat sheet.
Hack #1: Use a Business Card
Your business card is good for more than just networking. “If you tend to make a mess on your eyelid when applying mascara, put a business card or something similar behind your lashes as a backboard,” says makeup artist Sarah Biggers-Stewart. This will keep your eyelids smudge-free and your eyeshadow intact.
Hack #2: Use it as Eyeliner in a Pinch
No liner handy? No problem. Let your mascara do double duty. Take a small eyeliner brush, like the one found in the SLMISSGLAM Ombré Eye Brush Set, and swipe it against the plastic part of the mascara wand to pick up the product. Gently drag it along the upper lash line, moving from the inner corner of your eye outward.
Hack #3: Coat Both Sides of Your Lashes
If you think mascara can only be used underneath lashes, think again. For mega high-impact lashes (think thick and uber dark), cover them on both sides. After applying mascara underneath your lashes, go back in with the brush and slowly move it over the top of your lashes from roots to tips.
Hack #4: Apply Translucent Powder Between Coats
Yes, translucent powder like the CIATÉ LONDON Extraordinary Translucent Setting Powder is a serious shine stopper, but surprise, it can also make lashes appear thicker and fuller. “For extra fullness, you can lightly dust lashes with a translucent powder before applying mascara,” shares Lang. After one coat of mascara, brush a little powder onto tips of lashes, then add another coat of mascara to finish the look.
Hack #5: Hold the Wand Vertically to Hit Tiny Bottom Lashes
Sometimes those small little hairs can be really hard to cover, especially without major smudges. Do a 180 and hold the wand upright, gently pressing into lower lashes, coating every single strand. “You can also use this trick to catch those tiny lashes in the corner of your eyes,” notes Lang.
Hack #6: Let Smudges Dry Before Wiping Away with a Q-tip
Try this clean-up trick to remove smudges: let them dry first. Then grab a Q-tip and wipe across your eyelid, picking up every smidge of makeup that isn’t meant to be there.
Hack #7: Use Lash Tools to Your Advantage
A lash shield can ensure you are left with little to no mess after applying your mascara. You can also go through your lashes after you’ve applied your mascara with a lash comb or clean spoolie to get rid of clumps and emphasize volume.

The Most Common Mascara Application Questions, Answered
Still have some lingering questions about how to apply mascara? We’ve got you covered with all the answers, courtesy of the experts. Get all your FAQs answered below!
1. Should You Pump Your Mascara?
It seems like common sense to pump your mascara wand in and out of the tube…right? Well, that’s not necessarily what you should be doing. “Don’t pump the wand,” urges Lang. “It introduces air, which can dry out the formula more quickly. Instead, twist the wand gently inside the tube between applications.”
2. How Do You Prevent Mascara From Smudging Throughout the Day?
The question we all want answers to: How do you keep your mascara put? “This definitely depends on your skin type,” says Gray. “Those with more oilier skin tend to have problems with mascara smudging, as oil breaks down makeup. If you have a tendency for smudging, look into a tubing mascara or another formula with more staying power.” She says she prefers tubing mascara over waterproof mascara for oily skin types because waterproof can still smudge, whereas tubing does not.
Lang adds that “over-applying mascara is also a fast track to smudges on lower and upper lids.” Remember to work in layers and thin coats so you don’t overdo it.
3. How Do You Apply Mascara to Make Your Eyes Look Bigger?
Lang offers a simple response to this question, making it feel a lot less impossible to help your eyes look bigger with mascara. “Curl your lashes first, then concentrate product on the center and outer corners. It opens the eye and creates a lifted effect.”
Gray agrees, offering a more detailed alternative. “In order to make your eyes look bigger, I recommend getting a lengthening mascara and applying multiple coats evenly to the lashes. Move the lashes to a rounder shape, as opposed to a cat-eye arrangement, where the lashes are longer in the corners. A rounded lash look gives eyes a wide-open doll effect.” She recommends the CATRICE COSMETICS Curl Freeze Lash Styling Gel for this, noting that it “keeps lashes in place for a bigger eye effect.”
4. How Can You Make Your Mascara Last Longer Without Drying Out?
You shouldn’t pump your mascara, since doing so can dry out the product faster by introducing air. So, if you want your mascara to last longer, don’t pump. Lang also recommends “keeping the tube sealed closed and storing at room temperature away from sunlight—a little care extends the life of your favorite formula!”
Gray notes that you should be replacing your mascara every three months to keep the formula fresh. That’s why we love rotating a few travel-size tubes in our routine, since it helps ensure we don’t hold onto a mascara longer than we should!
5. How Many Coats of Mascara Should You Apply?
This definitely depends on the look you’re going for. If you want more drama, apply more coats. However, that doesn’t mean the sky is the limit. Both Gray and Lang recommend between three to five coats so that you don’t turn your lashes into spider legs.
6. How Do You Apply Mascara for a Dramatic Effect?
Again, more coats of mascara lead to a more dramatic effect. “You apply more coats of the formula and really build it up. Remember to start at the base and really wiggle the formula into the lashes,” says Gray.
7. How Do You Remove Waterproof Mascara?
Removing waterproof mascara may seem tricky, but it’s easier than you think. “I prefer to double cleanse the face, so I start with a makeup cleansing balm,” Gray shares. The ELEMIS Pro-Collagen Green Fig Cleansing Balm leaves our skin feeling hydrated sans irritation.
Lang then says to use a “gentle cleanser to remove your mascara and overall eye makeup. This helps keep the integrity of the lash while avoiding harsh or over-rubbing to the delicate skin of the eye area.” The TOYFACTORY Oatbae Hyaluronic Oat Milk Oil Makeup Remover is so incredibly gentle on the skin, especially the eye area. And it smells divine!
Final Mascara Tips
Proper mascara application begins with the right mascara. Determine what your overall goal is with your makeup look to help you determine if you need a lengthening, volumizing, curling, or tubing mascara before you apply it. Then, start with a little bit of prep (i.e., apply a moisturizer under your eyes and use a primer on your lashes for a boost of length). Once that’s done, you can start to apply your mascara in thin swipes and over three to five layers. Take your time and don’t be afraid to use extra tools as needed.
Need the tools for flawlessly applying mascara? IPSY has you covered. Explore the IPSY Shop now for everything from mascara and eyelash curlers to eyelash combs and shields.
Liked this post? Share!
Related Stories


How-To
Skin Barrier 101: How to Repair Summer-Stressed Skin
4 min read
How-To
How to Apply Cream Blush Without Overthinking It
5 min read
How-To
The Secret to Better-Looking Makeup Isn’t What You Think
6 min read
How-To
Got a Cut on Your Face? Here’s How to Help It Heal Without Scarring
4 min read
How-To
Why Everyone’s Scent Stacking Right Now
4 min read


How-To
How to Treat Yourself: 39 Simple Self-Care Ideas
15 min read

How-To
Here’s How to Build Your Perfect Skincare Routine for Both Morning and Night

How-To
10 DIY Face Masks That Are Expert-Approved & Actually Work

Beauty Picked Just for You
Get 5 products worth up to $70
Exclusive access to epic deals up to 80% off
Starting at just $15/month. Cancel anytime.