Braiding Your Own Hair Can Seem Daunting—These Pro Braid Tips Will Help


Elizabeth Denton

There are few hairstyles as universal as a perfect braid. Whether you're a Jane Austen character wearing a single three-strand braid to bed in the 1700s or Zoë Kravitz rocking box braids on the red carpet in 2019, they're as timeless as they are versatile. Before we jump into four easy braid tutorials, hairstylist Giovanni Vaccaro has a few quick prep steps in mind: “Brush your hair to remove any tangles. This makes it much easier to braid. I also recommend using a cream or paste to help smooth out any stray hairs.”
Braids also last longer on second-day hair, as hairstylist Ashley Gomila explains: “Braids are known to be a protective hairstyle that can be worn for several days. The reason braids are considered protective is because they do not require the use of hot hair tools. I prefer to braid hair that is one-to-two days out, so having freshly cleaned hair is not necessary. The natural oils in hair make braiding a lot easier to create especially when you're braiding on the scalp.” Gomila likes to add an oil or moisturizing gel while braiding to keep a more sleek uniform braid. If you want to rock a braid and you just washed your hair, consider adding a spritz of dry shampoo or texture spray to give it a bit more texture and grip.
Now, onto the braid tutorials. Below we'll walk you through how to master 10 popular braided hairstyles: the classic braid, the fishtail braid, the French braid, the Dutch braid, rope braid, ladder braid, crochet braid, heart bull-through, cornrows, and crown braid.
It's about glam time you treated yourself.
Join IPSY

MEET THE EXPERT
Ashley Gomila is a Los Angeles-based celebrity hair and makeup artist.
Giovanni Vaccaro is a hairstylist and the co-founder and chief brand officer of Glamsquad.
Your Step-by-Step Guide to Braiding Your Own Hair
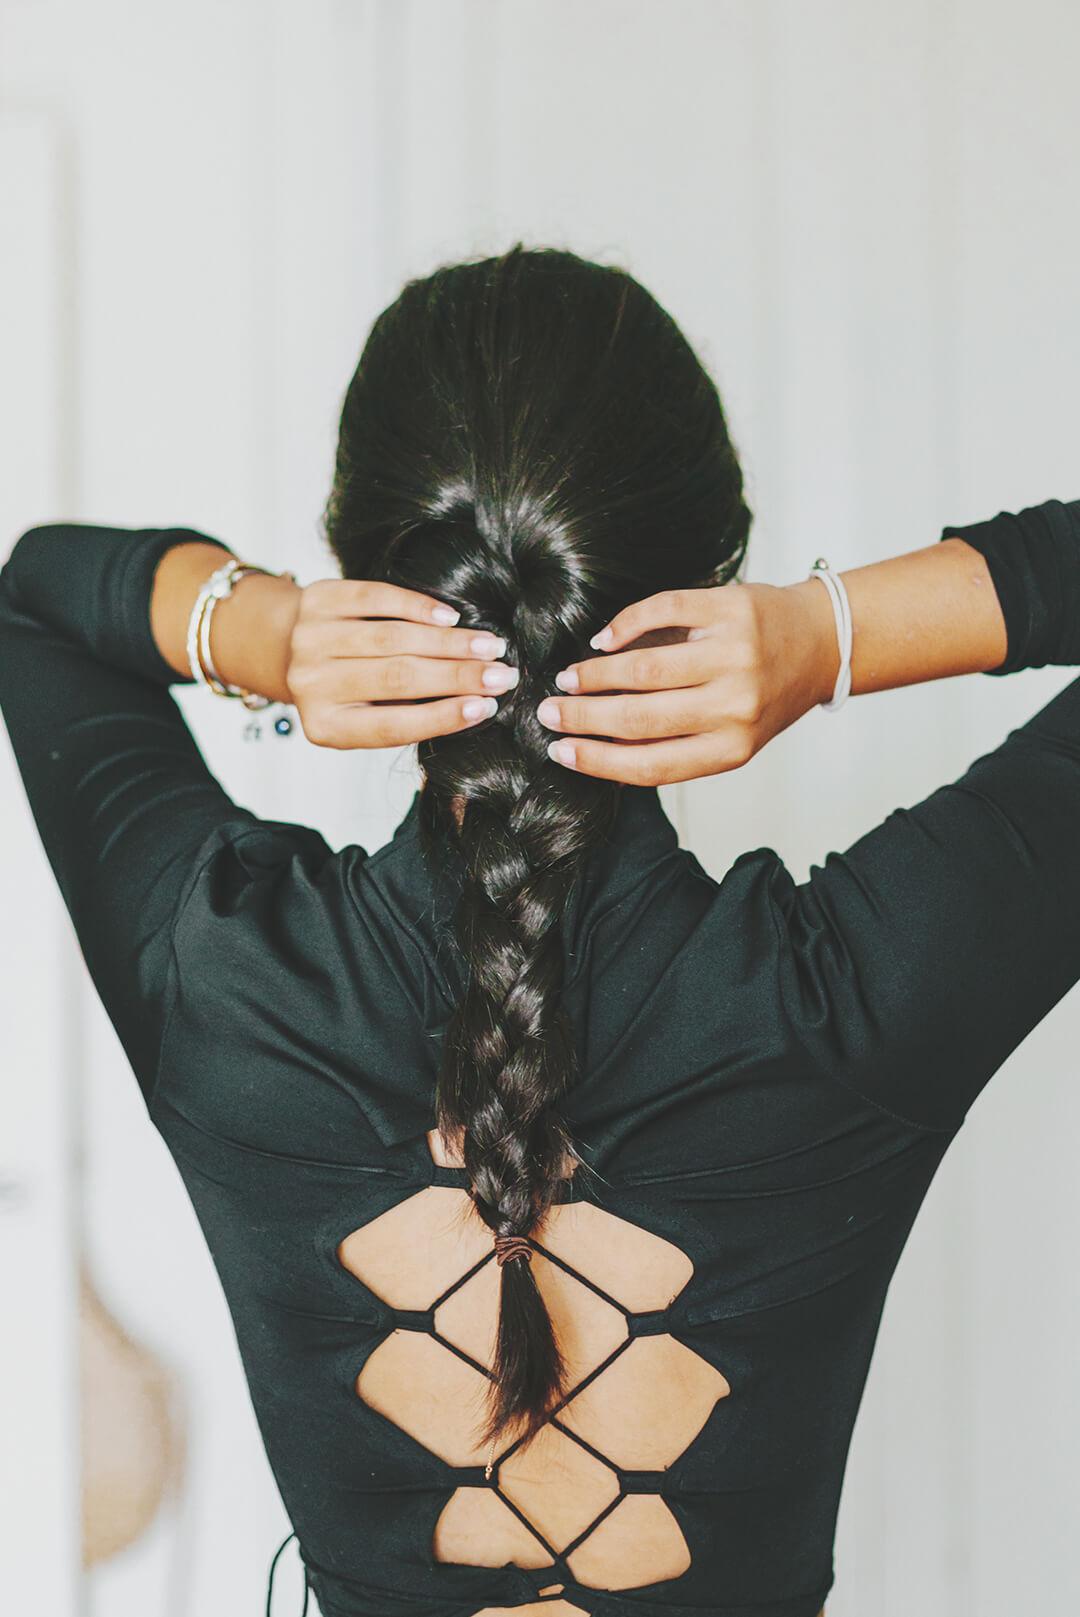
1. Classic Three-Strand Braid
If you’re a beginner, this is definitely the place to start. Consider it braiding 101. Once you nail this technique, you can riff off of it to create more intricate styles. To make this type of braid even easier, start by creating two side braids instead of one single braid along the back of the head. This way you can easily look at the braid in the mirror to get a better feel for the technique.
Step 1: Detangle your hair with a brush and detangler if it’s extra knotted. If you have frizzy hair, you might even consider applying a small amount of hair oil.
Step 2: Divide the hair into three equal sections at the nape of your neck. You'll have a left section, a right section, and a middle section. Hold the right section in your right hand and the left section in your left hand.
Step 3: Let the braiding begin! You'll begin by crossing the right strand over the center strand so that it now sits in the middle. Now the formerly right strand becomes the center strand and the center strand moves right. Then, take the left strand and cross it over to the middle so that this strand now becomes the center strand, and the strand in the center moves to the left.
Step 4: Continue on with this pattern, alternating between bringing the right and left section of hair to the center. Repeat until you have about one to two inches of hair left. Exactly how much you want to leave free is up to you. Finally, secure the braid with a hair elastic.
Take your three-strand braiding skills to the new level with this braided rose hairstyle:
2. Fishtail Braid
Delicate and extremely intricate-looking, the fishtail braid looks quite intimidating but it's actually fairly easy. Let's break it down.
Step 1: Detangle your hair with a brush and/or a detangler. To add a bit more volume to your hair, try quickly curling the hair before braiding it.
Step 2: Gather hair at the nape of the neck and secure it into a ponytail with a disposable hair elastic. Make sure this is an elastic that you'll be ok to lose as you're going to snip it away at the end.
Step 3: Divide the hair in the ponytail into two equal sections. Hold the right section in your right hand and the left section in your left hand.
Step 4: Now, you'll use a technique similar to the three-strand braid except this time you'll just be working with two. Take a very small piece from the outside of the left section and pass it over to the right section. Next, take a very small piece from the outside of the right side and bring it over to the left side. Repeat this process over and over until you have about an inch or two of hair left. Then, secure it with a hair tie.
Step 5: Now (very carefully!) snip the hair elastic at the top of the braid with scissors and remove it from the hair. Once you get comfortable with this braiding technique you can definitely try to do it without the disposable hair tie step, but it does allow for much more control. Just be super careful cutting!
Step 6: If you want a romantic, tousled fishtail braid, gently tug on each side of the braid to relax it and make it slightly messy-looking. You can also try pulling out a few pieces in the front. “The bigger the fishtail the better,” says Vaccaro, “Remember to seal your style so that it stays in place.”
Here’s how to give your fishtail braids extra volume:
3. French Braid
Once you're confident in your classic braid, here is a fun way to take things up a notch. Get the low-down on how to create a French braid below.
Step 1: Split your hair into three sections at the crown of the head.
Step 2: Begin by first creating one-to-two rows of a traditional braid, crossing the right strand over the center and then, crossing the left strand over the center.
Step 3: Once you've done this a couple of times, continue with the outside-strand-over-center pattern, but you’ll want to start bringing in other pieces of hair. Now, before crossing the left or right section over the center, grab a small section of hair from that side of your head and add it to the outside strand that is being moved to the center. You'll want to make sure you pick up a straight line of hair going all the way from the hairline to the back of the head where the braid is forming.
Step 4: Continue working your way all the way down until there is no hair left to incorporate. If you have long hair, you can then transition back to a traditional braid once you pass the nape of the neck.
Step 5: Once you finish braiding, tie the last one-to-two inches of hair into a ponytail holder.
4. Dutch Braid
Here's the good news: If you can master the French braid, you can also master the Dutch braid. Seriously! All it takes is one easy switch. “A Dutch braid is an inside-out French braid. French braids hug the head and lay closer to the scalp, whereas a Dutch braid stands up and off the scalp. There is a small difference in the braiding technique used. Rather than going over the middle section each time you cross like you do in a French braid you go under the middle section to create a Dutch braid,” says Vaccaro.
Step 1: Split your hair into three sections at the crown of the head.
Step 2: Create one-to-two rows of a traditional braid, with one extremely important adjustment: Instead of crossing the left and right strands over to the center, cross them under the center.
Step 3: Repeat the remaining steps just like you would with a French braid—grabbing a small section of hair from each side of your head and add it to the strand that is being moved. Just remember to always go underneath the middle strand to create the Dutch braid effect.
Step 4: Secure the last inch or two of hair with an elastic. If your hair isn’t quite long enough to fit into one single braid or even two side braids, Vaccaro recommends creating accent braids. “You can braid your hair across your hairline using the French or Dutch technique. I also love twists rather than braids for these lengths. This means you take your section of hair and split it into two instead of three and twist!”
Feeling confident with your Dutch braid skills? Up your Dutch braid to five strands. Here’s how:
5. Rope Braid
Also known as a false braid, the rope braid is technically more of a twist than a typical plait. Still, the finished result is seriously impressive.
Step 1: To do this braid neatly, having well-combed hair is key. You don't want your hair to get tangled as you are making your braid. “You can also dampen your hair, which will help it twist into cleaner sections,” says Gomila.
Step 2: If you want to make a tight, structured braid, start with your hair in a ponytail. Grab your hair, pulling it up to the height you want your ponytail. Secure it with an elastic band.
Step 3: Separate your ponytail into two equal sections. Taking one strand in each hand, twist each section around your fingers in a counterclockwise direction. “Make sure to keep your fingers tight on the twist,” says Gomila. “If you let them go, they will unravel and you will have to start over.”
Step 4: Holding one section in each hand, cross the pieces over one another in a clockwise motion. The twisted strands should switch hands. You should be crossing them in the opposite direction from the way you twisted your hair.
Step 5: Twist your braid, crossing the sections over one another until you reach the end of your hair. If you find that your hair is unraveling as you are braiding it, just twist it tight again before you continue your braid.
Step 6: Once you've reached the end of your hair, you’ll need to tie it with an elastic band. If you want your hair to look fuller, gently fluff out the ropes in your braid to give them extra width.
Braids can be versatile! Get the most out of your braids with these four style:
6. Ladder Braid
What happens when you combine a waterfall and French braid together? This eye-catching ladder braid.
Step 1: Decide where you'd like the braid to start. Divide freshly combed hair into three sections to start the braid.
Step 2: Braid from left to right. After one link, add a strand from the top and braid it in. After this, grab a strand from underneath and add it to your braid.
Step 3: Add another section from the top and braid it in, but this time, drop it to create a fallen strand. After this, add a strand from underneath. Continue repeating until you reach the back of your head.
Step 4: Simply finish it off with a plait and secure it with a clear elastic. Then, repeat this finishing step on the other side as well.
Step 5: Go back to the side you began with and create three sections underneath your first braid. Start braiding to the left and then to the right.
Step 6: Start by using the same exact techniques as the braid above, but this time, make sure that every section you bring in is from the braid above’s “fallen strand” drop. In doing this, you've created a gorgeous ladder look to the hairstyle.
Step 7: Simply finish it off with a plait. Secure with a clear rubber band.
7. Crochet Braid
Crochet braids is a protective hairstyle that’s extremely versatile. We especially love them in a mohawk style (tutorial below).
Step 1: Part hair at the back and brush hair with a boar brush.
Step 2: Start cornrows at the nape of your neck to create a zig-zag pattern.
Step 3: Cornrow the sides of your head.
Step 4: Connect both front and back cornrows
Step 5: Continue cornrows in small sections.
Step 6: Take your synthetic hair pieces in two shades and a crochet hook. Place the crochet hook under the cornrow, split curls in half, and hook the curl.
Step 7: Pull the hook through to create a loop.
Step 8: Pull the half piece of curl through the loop.
Step 9: Tie both pieces of curl together.
Step 10: Alternate hair colors every other and then every two for dimension and highlights.
Step 11: Cut and style as needed. Finish with a style and shine foaming mousse.
8. Heart Pull-Through Braid
Is there anything cuter than a braid literally in the shape of a heart?! Nope. We can’t get enough of this style and surprisingly do-able tutorial.
Step 1: Section hair in two and twist all the way down.
Step 2: Gently pull to loosen the twist.
Step 3: Repeat on the other side and tie them together with a clear elastic.
Step 4: Loop a section of hair on each side over the twist.
Step 5: Holding each section, tie together with another elastic to create a heart.
Step 6: Clip heart out of the way. Split the lower pony in two and add hair from the sides.
Step 7: Bring the top hair down and tie the lower pony over the top one with another elastic.
Step 8: Loosen the braid and continue down, looping the lower pony over the top as you go.
9. Cornrows
It’ll help to have a few things on hand when tackling this classic protective style. You’ll need a rat tail comb to create parts, some butterfly clips to move hair up and away, edge control for smooth edges, and duckbill clips for added security.
Step 1: Comb through the hair. You might need to blow dry first so there are no knots and tangles.
Step 2: Start with a triangular section of hair and split it into three smaller sections.
Step 3: Take the right piece under the middle and hold the outside strand. Continue while also picking up a small amount of hair as you go.
Step 4: Start another section, grabbing about ¼ inch of hair. Continue braiding, brushing through the hair with your fingers to ensure no knots.
Step 5: If you want to do cornrows with individual braids, wrap synthetic braiding hair around the parted hair before you start the cornrow.
Step 6: Braid your hair into the synthetic hair and repeat, applying edge control and leave-in conditioner as needed.
Step 7: Cornrow the top and sides of the hair, feeding in synthetic hair as needed to add length.
Step 8: Seal braids by dipping them into a cup of hot water. Go in sections around your head, re-dipping as needed. Dry hair with a microfiber towel.
10. Crown Braid
Paging Taylor Swift! The crown braid looks pretty and ethereal any time but especially for a special occasion, like a wedding.
Step 1: Part hair down the middle.
Step 2: Separate the top section of your hair from the bottom and tie away the bottom.
Step 3: Split the top hair in two and braid the right side, moving towards the left. Repeat with the other side.
Step 4: Wrap the braids around the center of the head and secure them with bobby pins.
Step 5: Cross braid the ends and pin them down.
Step 6: Twist the bottom segments and wrap them around your head as well, securing with bobby pins.
Step 7: Repeat until all the hair is in the “crown.”
Do you want to take your hair styling game to the next level? Take our Beauty Quiz now to get started with your very own IPSY Glam Bag and receive top-rated products every single month. Already an Ipster? Refer your friends to earn points, which you can use toward products. Either way, don’t forget to check us out on Instagram and Twitter @IPSY.
Like this article? Share it with your friends by clicking the icons below!
Liked this post? Share!
Related Stories


Hair
Thinking About Cutting a Bob This Summer? Start Here!
5 min read


Hair
Are You Leaving Your Conditioner on Long Enough?
4 min read


Hair
E.L.F. Just Entered the Hair Chat—Here's Everything in the Collection
3 min read


Hair
Heat Wave? These 12 Summer Hairstyles Are the Move
5 min read


Hair
The Best Bob Cut Haircuts for Every Face Shape, Hair Texture, and Styling Routine
7 min read


Hair
Ultra-Long Hair Is Everywhere Right Now—Here’s Why
3 min read


Hair
13 Blonde Balayage Looks That Prove the Hair Color Trend Is Here to Stay
3 min read


Hair
Brown Hair Color Guide: How to Choose the Right Shade, Undertone, and Style for You
10 min read

Beauty Picked Just for You
Get 5 products worth up to $70
Exclusive access to epic deals up to 80% off
Starting at just $15/month. Cancel anytime.