How to Create Your Own Marble Nail Art
IPSY Editors


While we all love a good neutral manicure, sometimes you want to have a little more fun with your nails. After all, #manimonday was meant for cool photos, right? There are endless nail art designs out there, and (surprise!) some of them are actually DIY-able. Meaning, you don’t have to shell out a ton at a fancy nail salon or spend hours perfecting your nail artist technique to get the look.
One of the easiest (but fanciest-looking) nail designs to DIY is the marble nail manicure. By layering just a few different nail polish colors, you can create a stunning marbled effect that looks gorgeous on any nail shape or length. Below, we break down how you can nail this super-easy nail design in our step-by-step nail art tutorial.
How to Do A Marble Manicure, Step-by-Step
Before we teach you how to swipe right, you’ll need to get your products and tools ready to go.
What You’ll Need
A Base Color: Your base shade can be any color, from a neutral tone to a bright bold hue. We chose a classic black polish, like TWILA TRUE BEAUTY in Little Black Dress, which has a sleek, glossy shine. Not feeling a true-black manicure? Opt for a deep red shade, like PRETTY WOMAN Nail Polish in Don't Be Jelly, for a slightly-lighter finish.
A Texture Color: This color should be a shade or two lighter than your base shade— you’ll be mixing them together to create the marble effect. If you decide to use black as your base, a grey shade like DERMELECT COSMECEUTICALS 'ME' nail polish in Eccentric would be a perfect texture color.
A Detail Color: This color will be the one you use to draw lines with, so you want it to pop. If you’re sticking with black or another dark base color, try a solid white nail polish like POP BEAUTY Nail Glam in White Vinyl.
A Metallic Color: Choose a metallic shade that will align nicely with your detail color. For a subtle gold shimmer that pairs well with almost any nail polish, opt for LONDONTOWN USA Kissed by Rose Gold.
A Detail Brush: You can head to your makeup bag for this tool; you actually can use an eyeliner brush to draw on your nails. ROYAL & LANGNICKEL Pink Essentials Detail Liner is a good option with a precise point. You can also use a tiny paintbrush if you have one handy.
Plastic Wrap: Surprise—this kitchen staple is actually essential for this marble mani. You’ll want to wad it up to create the marble effect.
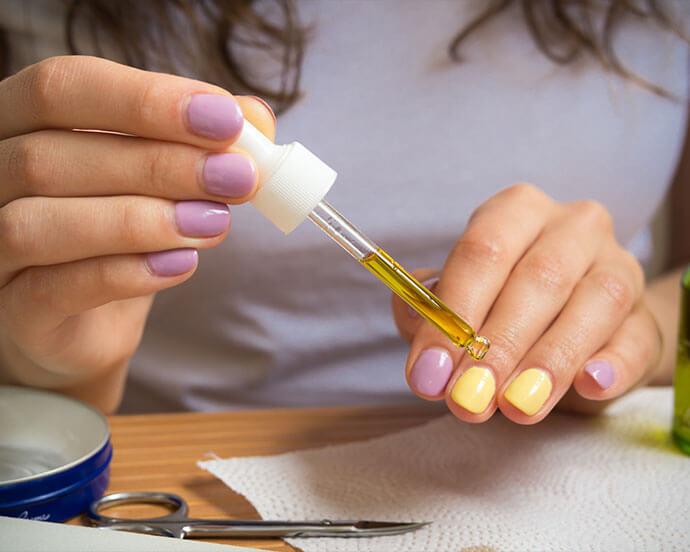
A Top Coat: The last, but a very important step, is a good top coat nail polish. It will help seal your polish and create a smooth texture after finishing your marble design. LAW BEAUTY ESSENTIALS Almost Gel Top Coat prevents chipping or cracking, and dries clear so your marbling work will be on full display.
A Clean-Up Brush: An eye shadow brush, like ELIZABETH MOTT All Over Eyeshadow Brush, works perfectly to get rid of any smudges.
Nail Polish Remover: Once you've finished your design, dip your clean-up brush into a remover to wipe away any excess polish. We love CONTEXT Soy Nail Polish Remover for a gentle but thorough clean.


Get the Look
Step 1: Apply Your Base Coat
Make sure to brush up until the very edge of your nails, covering the tips. Do two coats of the base color.
Step 2: Add Texture
Take the plastic wrap and wad it into a ball. Put a drop of the base color and texture color on a clean surface and press the ball into the two colors, mixing them together. Then gently press and roll the wrap onto nails, creating a textured finish.
Step 3: Add Detail
Once the base color and your texture color have dried, it's time to reach for your detail brush. Dip the detail brush into your detail nail polish color, then draw squiggly lines of this color sporadically onto nails, following any lines of texture as best as you can.
Step 4: Add Some Shine
Clean the detail brush using your nail polish remover, and wipe it off on a tissue until it's totally dry. Then, dip it into your metallic color and add metallic accents near the squiggly lines of your detail color.
Step 5: Remove Any Smudges
Clean the edges of your nails and any smudges on your fingers with an eyeshadow brush and nail polish remover. Wait for your color to dry before applying your top coat.
Step 6: Apply Your Top Coat
Apply one coat of top coat to seal the mani and let dry for at least 10 minutes. After that, you're good to go!
Marble Nail Art Ideas
Once you've mastered the classic marble nail, it's time to get experimenting. We've selected a few of our fave designs below, plus products and tips you can use to recreate them.
Sometimes one marble nail is all you need. We love the combo of marble, solid black, and glitter nails in this super fun design. For the accent nail here, just reverse the shades in our tutorial above to get a lighter marble look. For the pretty pink nails, try a color like LAW BEAUTY ESSENTIALS Smoking Mauve and top it with a multi-colored glitter like this ADESSE NEW YORK Glitter Nail Lacquer in Cosmopolitan.
Mix and match your marble with two complementary designs, like this one here. The grey and white marble looks great next to the design with black and metallics. Get the look with a pretty, flattering neutral shade, like TRUST FUND BEAUTY I Look Good Nude, and this fun, shimmery lavender grey from DERMELECT COSMECEUTICALS. Or stick with solid glossy polishes, like this dark grey from HELIOS, for a more traditional marble finish.
This blue and purple marble mani is a fun, chic twist on traditional marble manicures. It's a “cool tone” marble mani, meaning it will look great on those with a cooler skin tone (or those who look best in silver jewelry versus gold). Get the look with DECO MIAMI’s pretty polishes including Brickell Blue, Not Your Fortune Teller, and Male Tears.
Go for a galactic marble manicure with rich shades of deep purples. Then add fun accents with any color you choose. POP BEAUTY Nail Glam in Purple Pop is a luxe violet with just the right amount of shimmer that's perfect for an out-of-this-world marble nail design.
It's about glam time you treated yourself.
Join IPSY

Liked this post? Share!
Related Stories


Nails
Why Natural-Length Nails Are the Biggest Manicure Trend Right Now
5 min read


Nails
FIFA World Cup 2026 Nail Art Designs You’ll Get a Kick Out Of
2 min read
Nails
Spurs or Knicks? Show Support for Your NBA Team With These Nail Art Ideas
2 min read
Nails
Why Everyone’s Suddenly Asking for Soap Nails
3 min read

Nails
The Easiest Way to Moisturize Your Nails All Year Long
3 min read

Nails
Strawberry Milk Isn’t Just a Tasty Treat—Here’s How to Ace the Nail Trend!
6 min read


Nails
10 Cute and Colorful Korean Jelly Nail Designs to Try This Summer
5 min read

Nails
The Ultimate Aura Nail Guide: DIY Tips & 10 Dreamy Designs to Try
5 min read

Beauty Picked Just for You
Get 5 products worth up to $70
Exclusive access to epic deals up to 80% off
Starting at just $15/month. Cancel anytime.