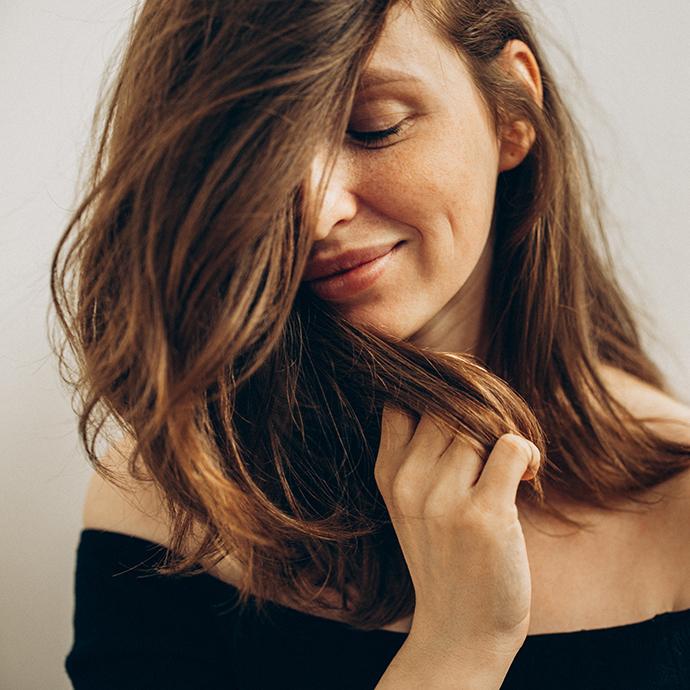
How to Cut Your Own Bangs at Home Like a Pro


Cortney Clift


Whether you're steering clear of hair salons at the moment or you're looking to switch up your hairstyle at home, cutting your own bangs is not an impossible beauty skill to learn. However, as many a fail video has shown us, it is something that can go terribly wrong, terribly fast if you don't have the right tools and techniques down pat.
Below, we're taking you through everything you need to know to cut or trim your bangs at home with a step-by-step tutorial and tips from a hairstylist. Just remember the golden rule of haircutting: You can always take more off but you can never add more back on. Be conservative with your snips and go slow when playing at-home hair stylist so that you carefully craft a new look you won't regret.
One important note before we get started: This tutorial will work best for those with straight to wavy hair. As curly hair types know, there is a level of mastery required to properly snip curly hair. If you have this hair type, it's best to leave any bang cutting to the professionals.
It's about glam time you treated yourself.
Join IPSY

MEET THE EXPERT
Lana Grand is a Los Angeles-based celebrity hairstylist and colorist with over 17 years of experience in the beauty industry. Explore her work on her Instagram @lana_grand_hair.
How to Cut Bangs at Home
What You'll Need:
Haircutting shears
A fine-tooth comb with a tail end
Sectioning clips
A blow dryer and round brush
A straightening iron (optional, depending on your hair type)
How to Cut Your Own Bangs, Step-by-Step
Step 1: Begin with dry, straightened hair.
"Whenever attempting an at-home bang trim, first and foremost make sure your hair is clean, blow-dried, and perfectly smooth," says hairstylist Lana Grand. "Use a round brush to blow-dry and a straightening iron for coarse hair. Make sure hair doesn't split or have any kinks." The reason you want to cut bangs with dry hair is that wet hair tends to shrink up a bit when it dries. That means if you cut your bangs while they're wet, they'll likely end up shorter than you planned once they air dry.
Step 2: Section off the hair.
Now that your hair is sleek and straight, it's time to section off the hair you'll either be trimming or transforming into bangs. If you already have bangs, it should be easy to separate your bangs from the rest of your hair. If you're creating new bangs, you'll want to create an upside-down v-shape from the crown of the head to the temples.
To figure out how far back the top point should be, Grand suggests placing a comb on the crown of your head. Find the point where the comb separates from the head. Grand says this tends to be about 1-1.5" back from the hairline. After you've found the forward slope, use the parting side of the tail comb to create a straight line from there to the temples (about even with the outer edge of the eyebrows).
When figuring out how much hair to include, Grand says less is more. "If it is your first time cutting it, start with less hair first. You can always add more hair, but you can't reattach the hair." Once you've created your bang triangle, use sectioning clips to pin back the rest of your hair from the hair you're planning to cut.
Step 3: Comb through the hair.
In one hand, hold the hair securely between your index finger and your middle finger. In your other hand, use your fine-toothed comb to comb through the hair. Position the comb above the securing fingers, running both down the entire length of the hair–the comb detangling and the fingers keeping the hair locked in place. Do this a few times until the hair between your fingers is smooth and straight between your fingers. Note: If you're only trimming your bangs, skip steps 4-6 and move on to point cutting (step 7).
Step 4: Decide how long you want your bangs to be.
If you're cutting entirely new bangs (as opposed to trimming them), try starting with curtain bangs that fall right under the cheekbone. Once you've found where you'd like your bangs to end, make sure the smooth, combed hair is still secured between your index finger and middle finger. Your two fingers should be holding the hair taut but not tight. Move the fingers just a touch below the endpoint you decided on, giving yourself a little bit of wiggle room to work with. Once you find that spot, keep your fingers steady and level across the width of the face.
Step 5: Make the initial cut.
It's time to make the first cut! Take your pair of shears and make a clean, straight cut across the hair, using your level fingers as a guide. Once you've cut all the way across, let the hair hang free and check your work, making sure that the bangs look even across the face.
One easy way to check if both sides are even is to take a strand from each end and bring them together, to the center of the nose, making sure they're both the same exact length.
Step 6: Perfect your cut.
At this point, your cut hair is going to look like some extremely blunt bangs. It's time to give them a softer and more natural-looking angle. Remove your securing finger from the bangs and allow them to part where they would naturally. Pin one side back while we perfect the other side. Pick up your comb and use those securing fingers again, this time over-directing the hair across the face, and bring the hair parallel to the long side of your bang triangle (the part that goes from your crown to your temple). Run your fingers and comb down to the bottom of the bangs until your finger reaches the end of the outer edge of the freshly cut hair.
You'll notice that there's an angle to the hair below your securing fingers—the outer edge being the shortest with the hair towards the center of the forehead being the longest. You're now going to even that out. Make sure those securing fingers are perfectly parallel with the crown-to-temple parting of your bang triangle. Then, snip across the fingers from the outer edge to the center, cutting off the angling below your fingers. After you cut across, the hair should be flush with your fingers.
When you release the bangs, they should now fall with a smooth, natural-looking angle with the center-most bangs being the shortest and the outer edge being the longest. Repeat this step on the other side.
Step 7: Texturize your bangs.
To make those ends look soft, textured, and natural, you'll finish with a bit of point-cutting. Bring your bangs together, centering them on your face, just like when you made that first cut across. Run your comb and fingers through the bangs a few times making sure the hair is smooth and straight in your fingers.
Keeping your securing fingers just above the ends, you'll now point-cut the hair. To point-cut, hold your shears so that the ends are parallel to your hair and pointed up towards the forehead. Then, snip straight up into the ends of the hair from below. Point-cutting will create a soft, textured finish and help to take out any bulkiness.
Point-cutting can also slowly take off length, which makes it great for anyone doing an at-home bang trim. Because it can remove both bulk and length, be sure to work slowly here so that you don't remove too much hair. If you have thin hair, be super cautious during this step or maybe even skip this step if you’re happy with how your bangs look after angling them.
Haircutting Tips and Tricks
1. Go for wispy, curtain bangs if this is your first time cutting bangs
"I would not suggest trying to cut straight-across bangs yourself," says Grand. "It is extremely hard to get a perfectly straight line yourself." Instead, Grand recommends opting for curtain-style bangs, like we've provided instructions for here.
2. Always, always, always use haircutting shears
Kitchen scissors, crafting scissors, eyebrow scissors—all of these won't work for a DIY haircut. If you're planning to trim your hair at-home it's super important to invest in the right tools. Kitchen scissors have large, wide blades that make it hard to be super precise with your cutting. Hair-cutting shears, on the other hand, are specifically designed to make fine, precise, sharp cuts, giving you more control.
3. Create face-framing layers
If your freshly cut bangs look a bit disjointed from the rest of your hair, try creating face-framing layers to help your bangs blend in better. To do this, you'll want to find the sides of the bang triangle that go from the crown of the head to the temple. This time though, continue past the temple and go down to the top of your ear. Pin back the rest of the hair. With your shears angled and pointed downwards (they should be pointed to about 7 o’clock), use the back part of the scissor's blade to gently shear down the long hair below the bangs, making sure to avoid cutting the bangs at all. This will create a smooth gradient from the bangs to the ends.
Want to become a pro in all things hair and beauty? Take our Beauty Quiz now to get started. Already an Ipster? Refer your friends to earn points, which you can use toward products. Either way, don’t forget to check us out on Instagram and Twitter @IPSY.
Like this article? Share it with your friends by clicking the icons below!
Liked this post? Share!
Related Stories


Hair
Thinking About Cutting a Bob This Summer? Start Here!
5 min read


Hair
Are You Leaving Your Conditioner on Long Enough?
4 min read


Hair
E.L.F. Just Entered the Hair Chat—Here's Everything in the Collection
3 min read


Hair
Heat Wave? These 12 Summer Hairstyles Are the Move
5 min read


Hair
The Best Bob Cut Haircuts for Every Face Shape, Hair Texture, and Styling Routine
7 min read


Hair
Ultra-Long Hair Is Everywhere Right Now—Here’s Why
3 min read


Hair
13 Blonde Balayage Looks That Prove the Hair Color Trend Is Here to Stay
3 min read
Hair
Brown Hair Color Guide: How to Choose the Right Shade, Undertone, and Style for You
10 min read

Beauty Picked Just for You
Get 5 products worth up to $70
Exclusive access to epic deals up to 80% off
Starting at just $15/month. Cancel anytime.