How to Use the LITHE BEAUTY Truffle Eyeshadow Palette 3 Ways
Maddie Aberman
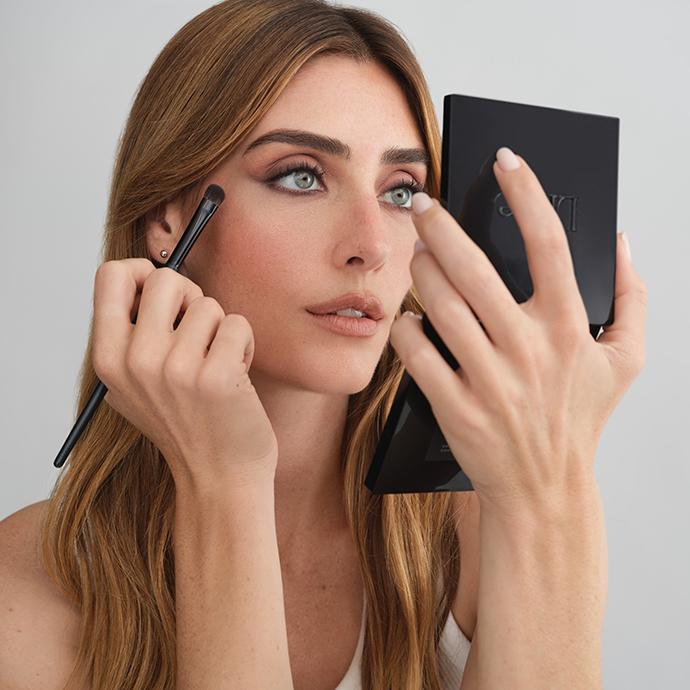
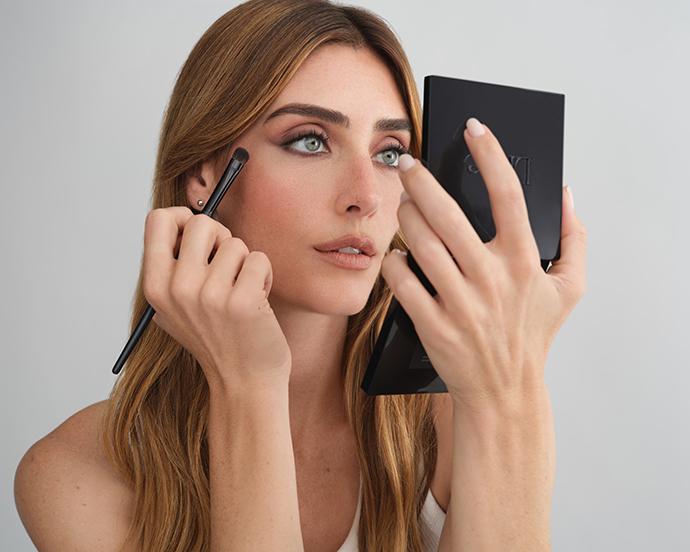
One palette. Three unforgettable entrances. Consider your holiday glam officially handled.
The social season is upon us, and your calendar isn't the only thing filling up. From intimate cocktail hours to festive dinners and celebrations that call for a little extra sparkle, every invitation deserves a beauty look to match. Enter the LITHE BEAUTY Truffle Eyeshadow Palette, your new go-to for creating everything from softly sculpted daytime eyes to after-dark glamour.
The best part? Every IPSY Ultimate subscriber is receiving this $42 palette as part of their curated eight-piece Winter Collection. With nine versatile shades inspired by the rich warmth of cocoa, coffee, and truffle tones, it's the kind of beauty essential you'll reach for long after the last holiday toast. And because we believe great makeup should be as much about expression as it is about performance, we're showing you exactly how to make the most of every shade.
Keep scrolling to discover three distinct eyeshadow looks created exclusively for IPSY, complete with the techniques, tools, and makeup-artist tricks you need to recreate them yourself. Your RSVP is officially handled.
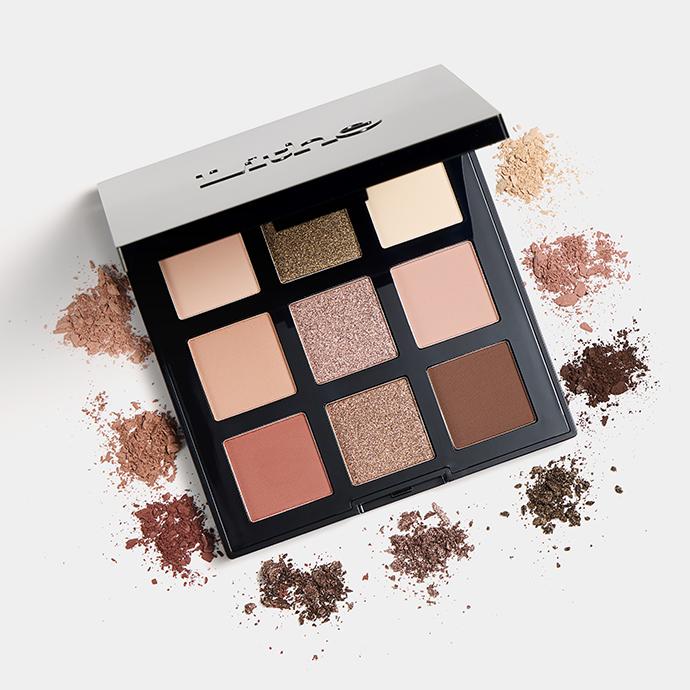
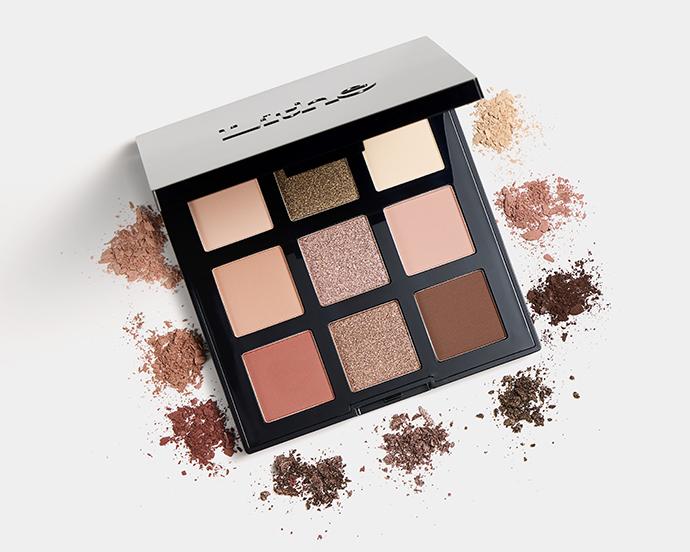
LITHE BEAUTY Truffle Eyeshadow Palette
It's about glam time you treated yourself.
Join IPSY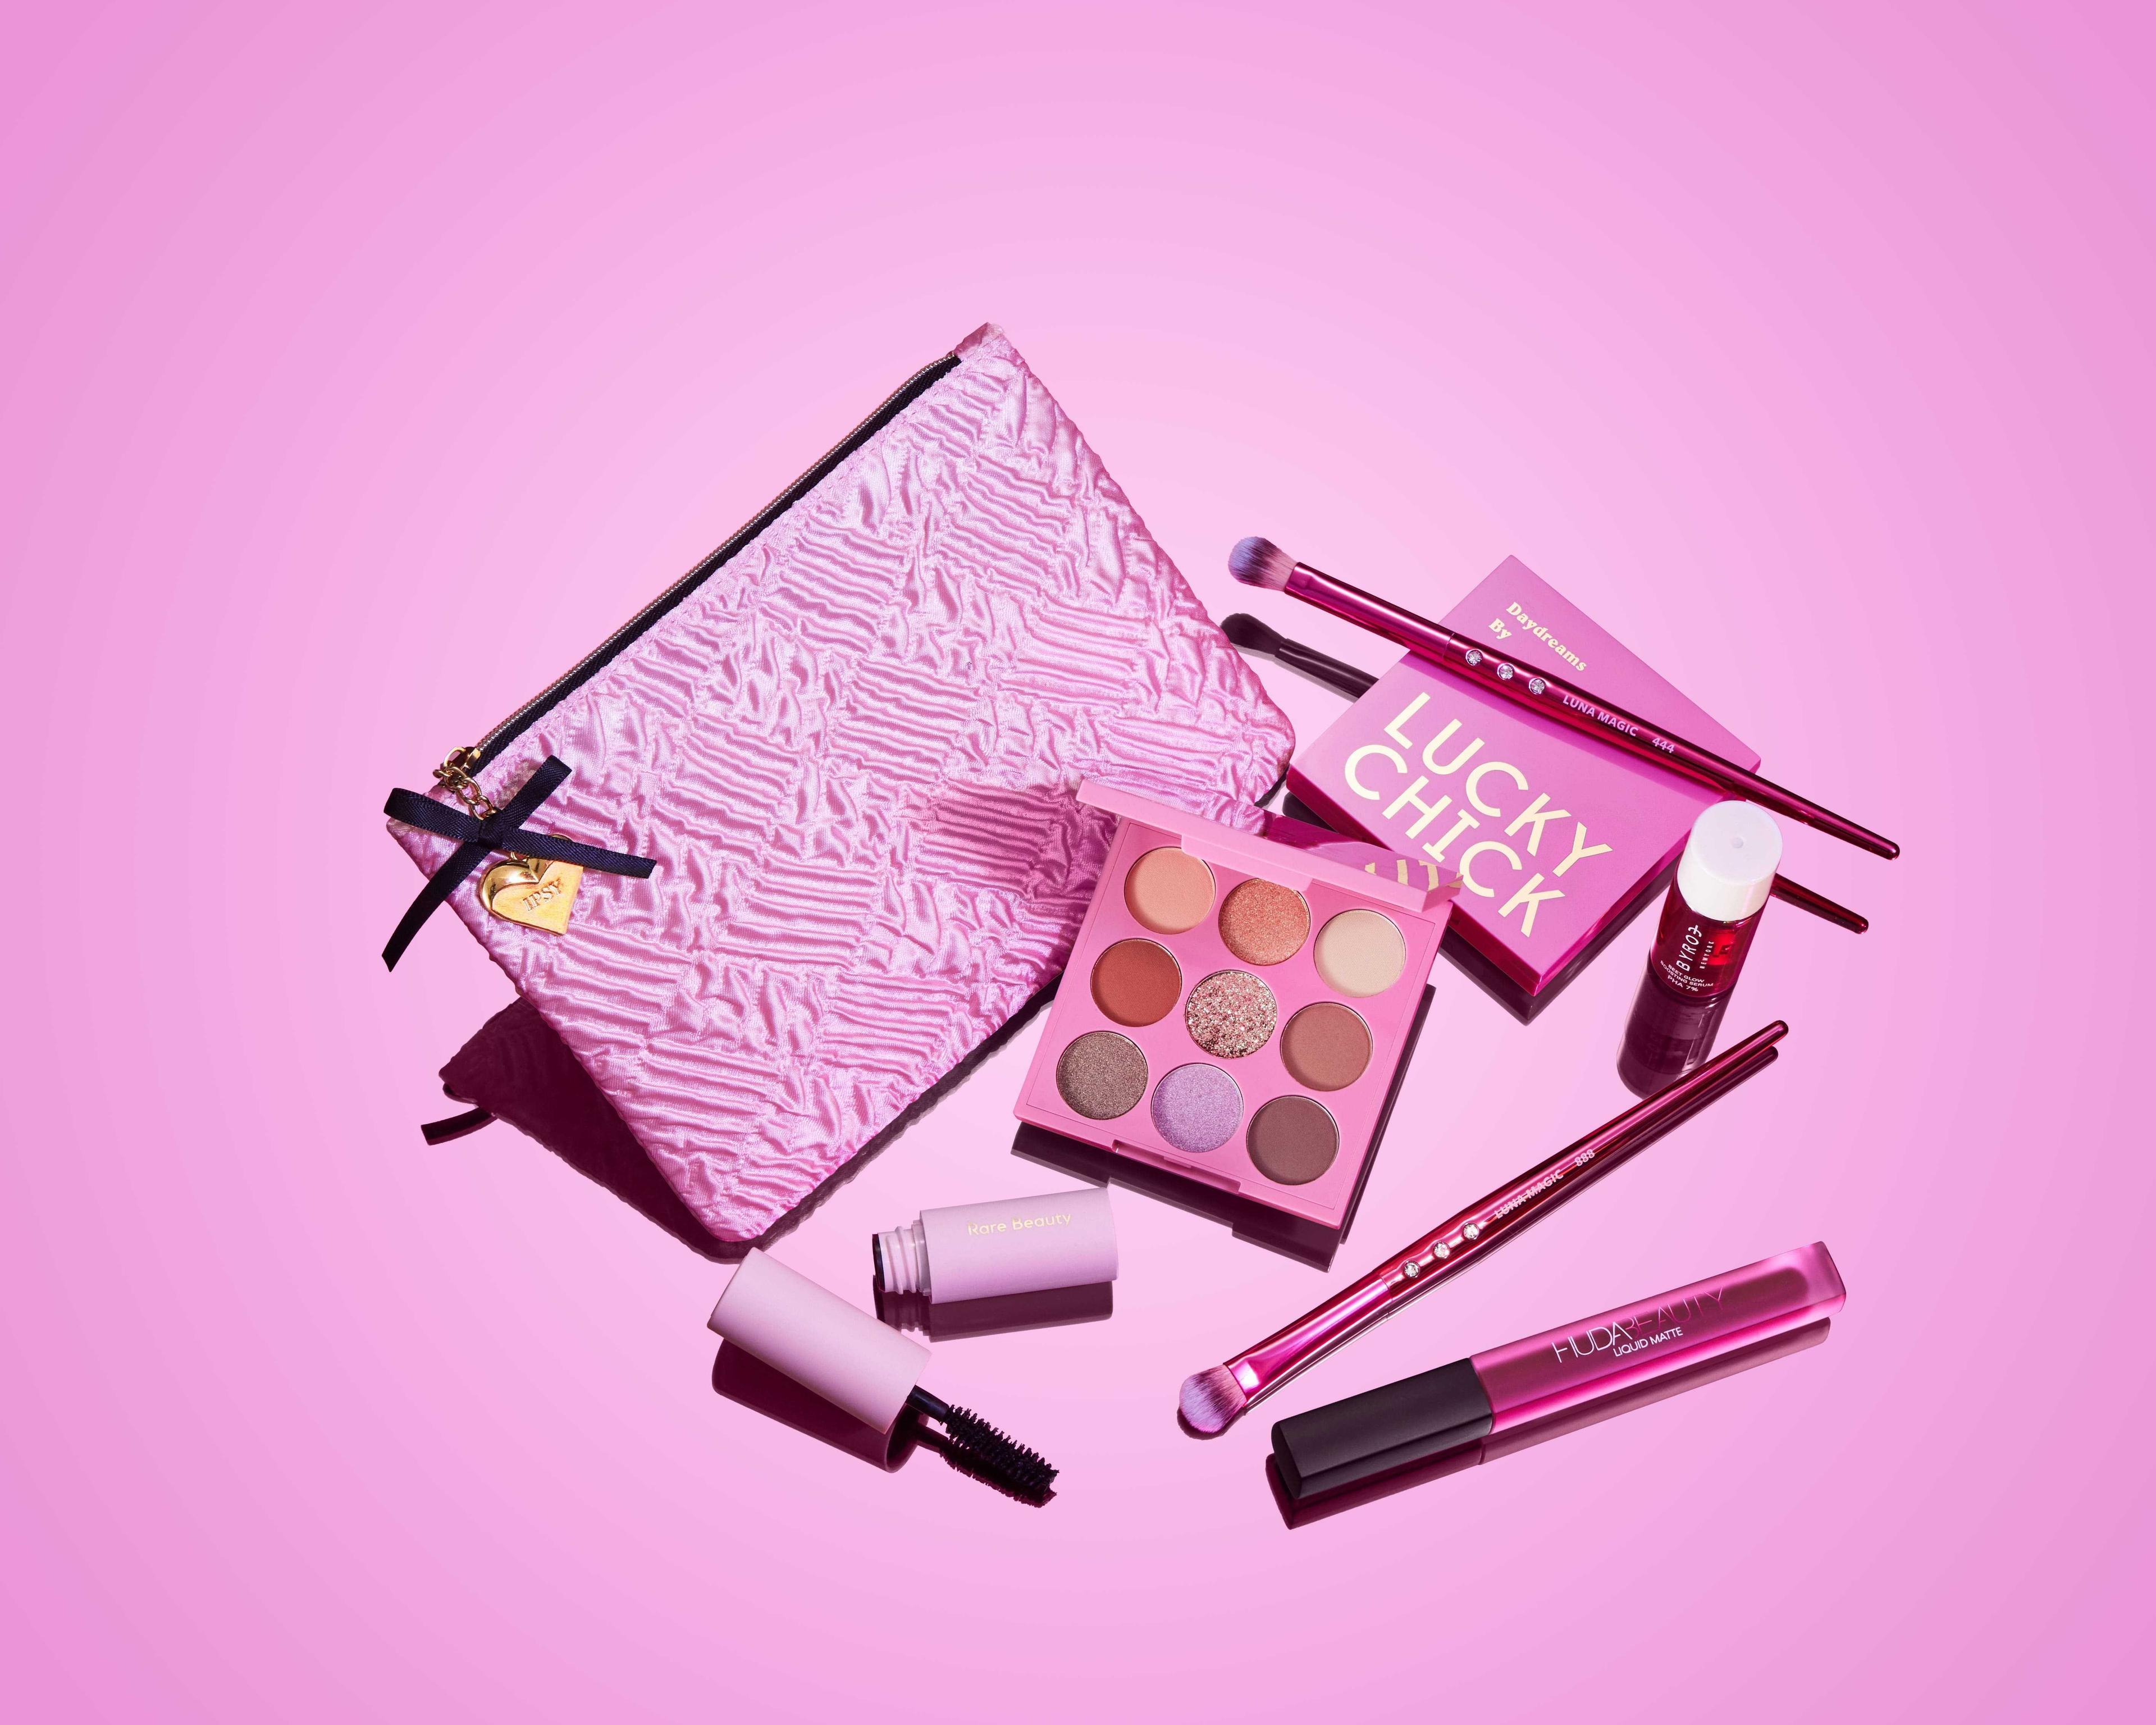
Meet Your New Go-To Eyeshadow Palette
Think of the LITHE BEAUTY Truffle Eyeshadow Palette as your invitation to play. Its thoughtfully curated mix of soft mattes, rich neutrals, and light-catching shimmers makes it easy to create looks that feel polished, expressive, and entirely your own.
The silky formula delivers rich color payoff with minimal fallout, while the complementary shades take the guesswork out of creating a cohesive eye look. Whether you prefer barely-there definition or a statement-making smoky eye, there's a combination for every mood—and every occasion.
Before you begin, keep three brushes nearby: a fluffy blending brush for diffusing color, a smaller tapered brush for precise crease work, and a short, dense shader brush for packing on pigment. A clean blending brush is also worth having on hand for softening edges without adding more product.
Ready to get acquainted? Here's how to create three completely different looks with your new palette.
Look 1: The Welcome

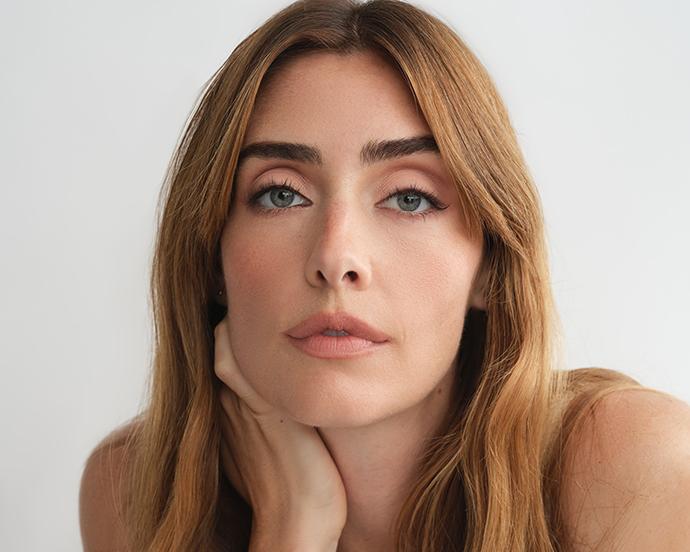
Softly sculpted. Effortlessly polished. The perfect first impression.
There's something undeniably chic about makeup that looks like you barely tried—even when every detail is intentional. The Welcome is your understated, everyday eye look, featuring soft peachy definition, a velvety matte finish, and just enough depth along the lashes to make your eyes stand out.
It's the kind of look that works beautifully for daytime gatherings, intimate dinners, or any occasion where you want to feel put together without going full glam.
The shades you'll need:
Matte beige (top left)
Mid-tone peach (middle left)
Deep brown (bottom right)
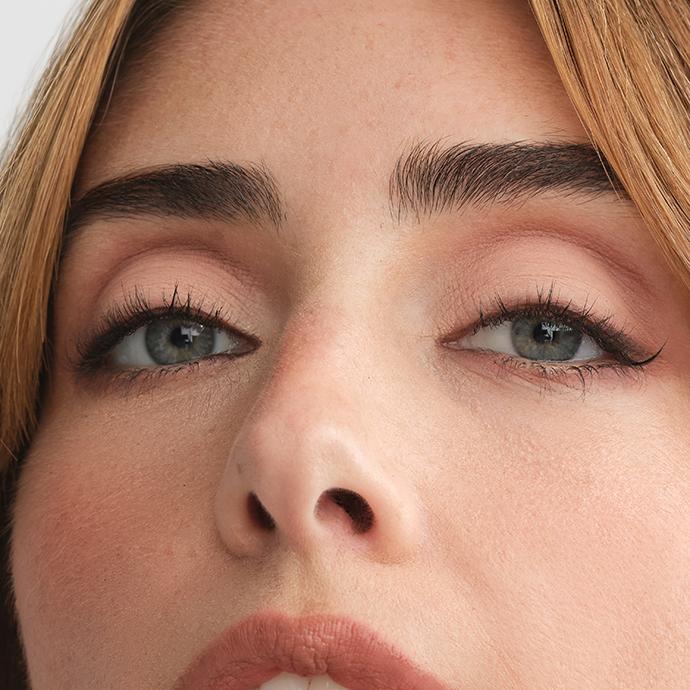
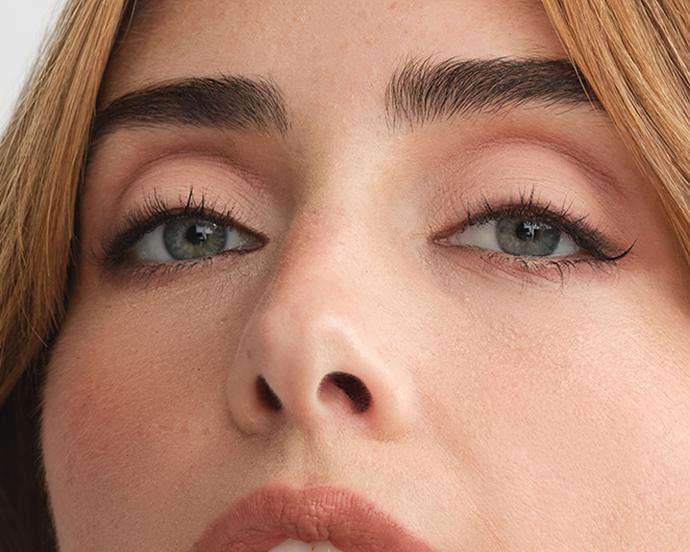
Step 1. Create a Soft, Even Base
Start with clean, dry eyelids. If your lids tend to get oily or your eyeshadow creases throughout the day, apply a thin layer of eyeshadow primer and let it set for a few seconds.
Using a fluffy eyeshadow brush, sweep the matte beige shade (top left) across your entire lid, from your lash line up into your crease. Keep the application light and even, using gentle back-and-forth motions to distribute the color.
This creates a smooth-looking canvas for the remaining shades and helps the deeper colors blend seamlessly.
Pro tip: If you have hooded eyes, apply your base shade with your eyes open and looking straight ahead into a mirror. This helps you see exactly where the color will remain visible once your eyes are relaxed.
Step 2. Add Subtle Dimension With Peach
Next, pick up a small amount of the mid-tone peach shade (middle left) on a fluffy, tapered blending brush. Tap off any excess, then place the brush at the outer third of your crease.
Using small windshield-wiper motions, gently work the color inward, following the natural curve of your crease. Concentrate the most pigment at the outer corner and gradually soften it as you move toward the center.
The goal is a subtle wash of warmth that defines your eye shape without creating an obvious line of shadow. For a little extra lift, blend the outer edge slightly upward toward the tail of your brow rather than dragging the color downward.
Pro tip: Hold your brush near the end of the handle instead of close to the bristles. The lighter pressure helps create that soft, diffused finish worthy of an expert makeup artist.
Step 3. Define Your Lash Line Without Eyeliner
For the finishing touch, dip a small angled brush or short, dense shader brush into the deep brown shade (bottom right). Press the color directly into your upper lash line, starting at the outer corner and working inward using tiny stamping motions. Keep the pigment as close to the roots of your lashes as possible.
Rather than drawing a thick line, think of this as filling in the spaces between your lashes to create the illusion of fuller, more defined lashes.
For a slightly more sultry effect, extend the shadow just a few millimeters beyond your outer corner, then gently soften the edge with a clean detail brush.
Finish with a coat or two of mascara, concentrating on the outer lashes for a naturally lifted effect.
Look 2: The Toast
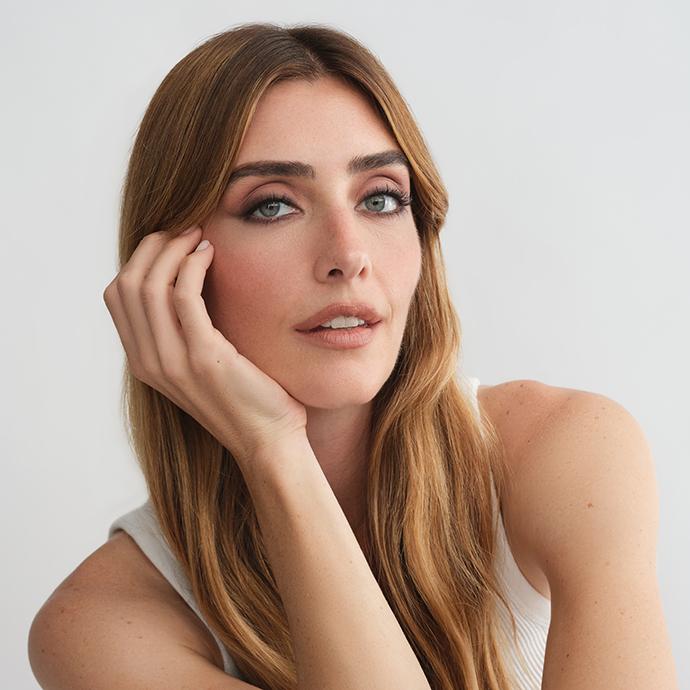
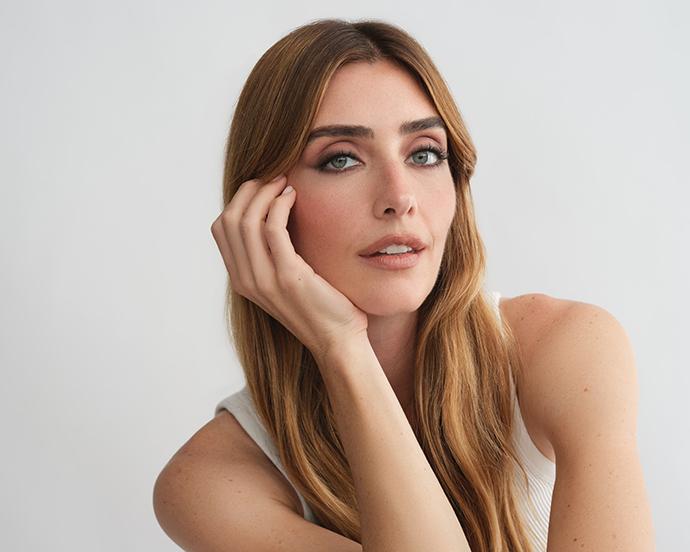
Warm, softly smoked, and made for golden hour.
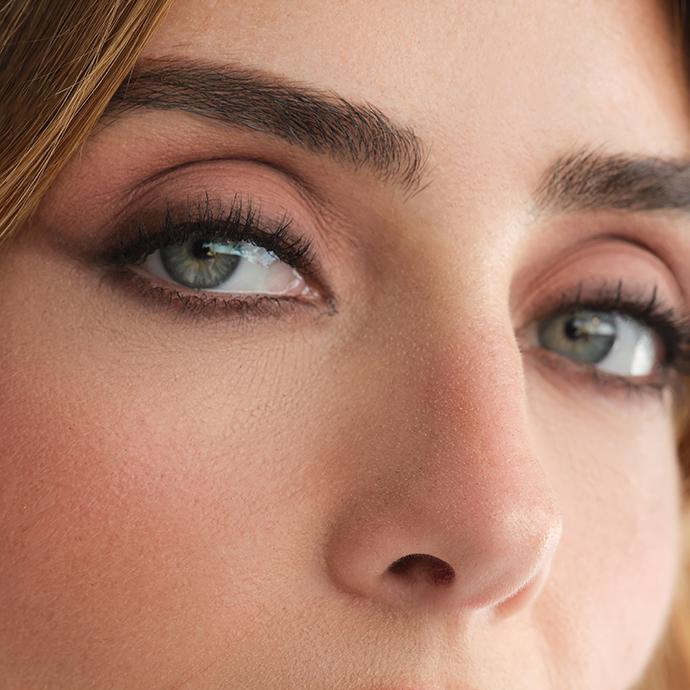
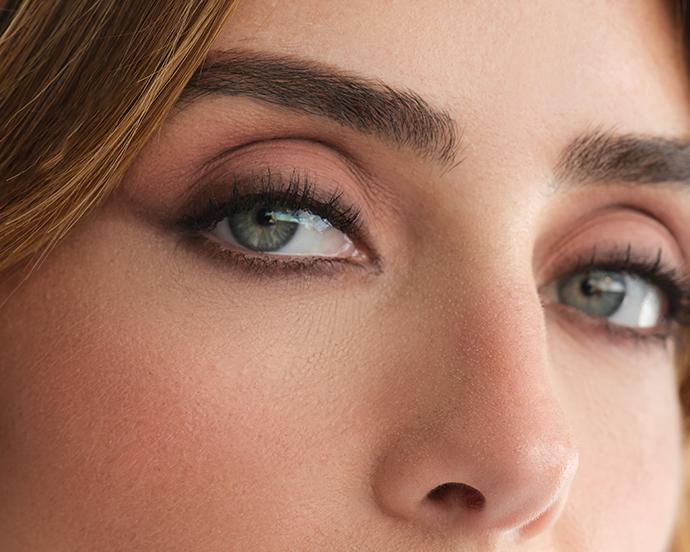
Consider this your invitation to turn things up a notch. The Toast takes classic neutral eyeshadow into sultrier territory with warm brown tones, softly diffused edges, and an elongated shape that subtly lifts the eyes.
The effect is polished and a little seductive without the heaviness of a traditional smoky eye. Perfect for candlelit cocktails, festive dinners, and any occasion that calls for a little more definition.
The shades you'll need:
Warm matte brown (bottom left)
Deep brown (bottom right)
Step 1. Build Your Warm Brown Base
Begin by applying a thin layer of eyeshadow primer to help your shadow grip and stay in place. Then, using a medium-sized fluffy blending brush, pick up the warm matte brown shade (bottom left) and press it onto the outer half of your eyelid.
Once you've placed the pigment, begin blending it across the entire lid and upward into your crease using small circular motions. Keep the color most concentrated near your lash line and outer corner, allowing it to become softer as it approaches your brow bone.
Unlike The Welcome, this look is meant to have a little more depth, so don't be afraid to build the color gradually in layers.
Pro tip: Instead of blending in large windshield-wiper motions right away, start with small circles exactly where you want the most pigment. This keeps the shadow from spreading too far or losing its shape.
Step 2. Create a Soft, Elongated Wing
Now for the technique that makes this look special. Using a small angled brush, pick up the deep brown shade (bottom right) and press it along the outer third of your upper lash line.
As you reach the outer corner, gently flick the shadow outward and slightly upward, following the natural angle of your lower lash line toward the end of your eyebrow.
Keep the wing soft rather than sharply defined. Then use a small, clean blending brush to diffuse the upper edge, blending the color back into the warm brown shadow on your lid. The result should be a subtle, smoky extension that makes your eyes appear longer and more lifted.
Pro tip: Imagine drawing a straight line from the outer corner of your lower lash line toward the tail of your brow. That's your guide for the wing shape. Following this angle helps create lift without pulling the eyes downward.
Step 3. Connect the Upper and Lower Lash Lines
To bring the look together, use a small smudging brush to apply the deep brown shade along the outer third of your lower lash line.
Start at the outer corner, then gently work the color inward, keeping it close to the lashes. Connect the lower shadow to the wing you created on top so the two sections form one continuous, softly elongated shape.
For a more diffused finish, lightly blend the warm matte brown along the lower edge of the deeper shade. This creates a seamless transition and keeps the smoky effect from looking too harsh.
Pro tip: Keep the darkest shadow concentrated at the outer corners rather than extending it all the way to your inner corners. This helps maintain an open, lifted appearance while still giving you plenty of definition.
Finish with mascara on your upper and lower lashes, adding an extra coat to the outer corners if you want a more dramatic effect.
Look 3: The Last Dance
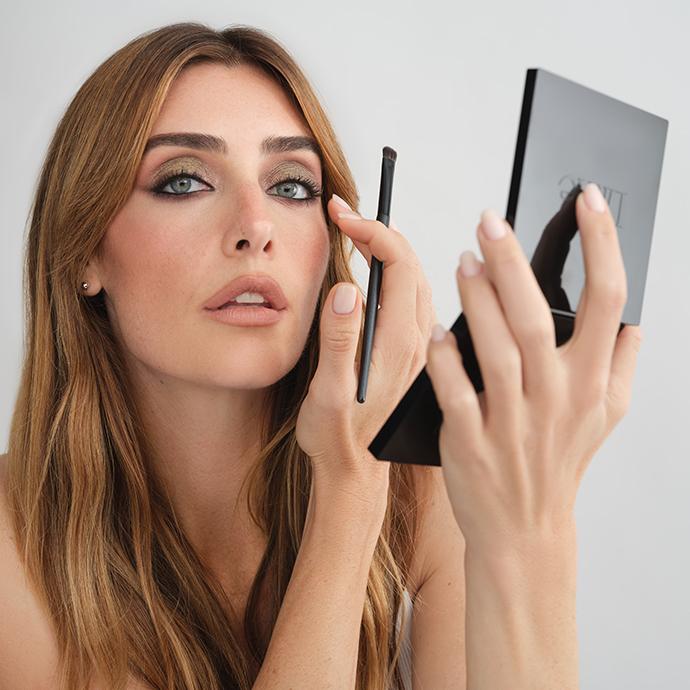
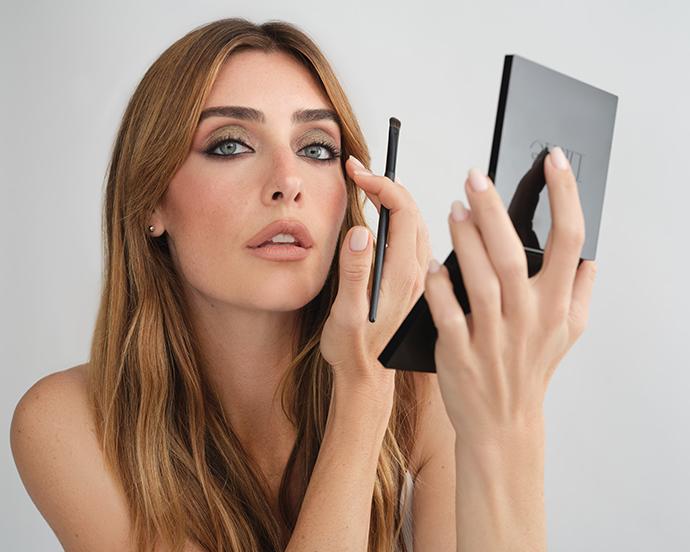
Light-catching shimmer. Smoldering definition. An unforgettable exit.
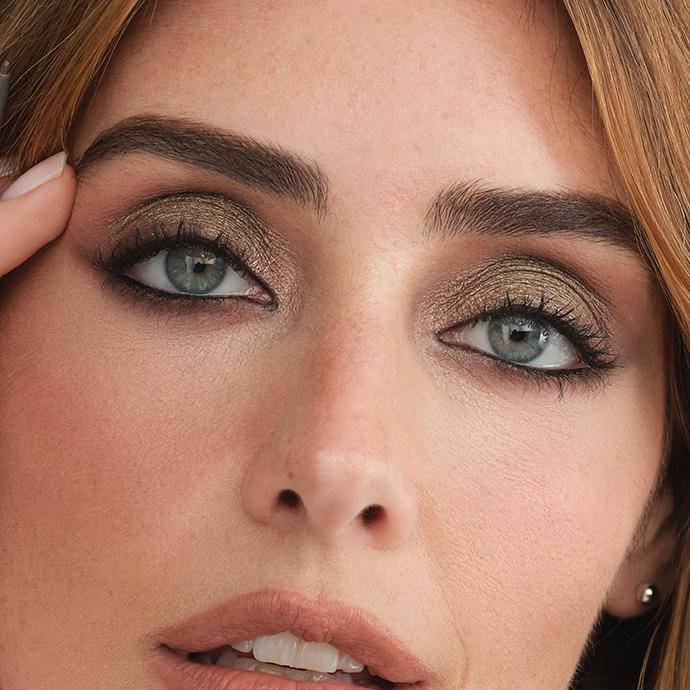
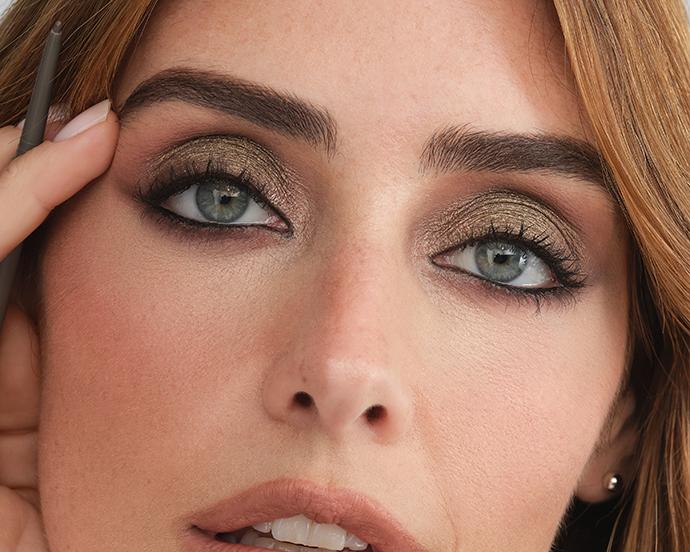
For the nights that deserve a little extra, meet The Last Dance. This statement-making eye look pairs rich olive shimmer with smoky brown definition and a flash of rose gold at the inner corners.
It's a sophisticated alternative to the traditional black smoky eye, with dimensional metallic tones that catch the light beautifully. Think festive parties, late-night celebrations, and every occasion that calls for making an entrance.
The shades you'll need:
Olive shimmer (top center)
Deep brown (bottom right)
Rose gold shimmer (center)
Step 1. Lay Down Your Olive Shimmer
Start with an eyeshadow primer to give the shimmer something to adhere to. For the most intense metallic payoff, leave your primer slightly tacky rather than setting it with powder.
Using a flat, dense shader brush—or your fingertip—pick up the olive shimmer shade (top center). Press the pigment onto the center of your eyelid using gentle patting motions, then continue building the color across your lid toward the inner and outer corners.
Avoid sweeping the brush back and forth at this stage. Pressing the shimmer into place helps maximize its reflective finish while minimizing fallout.
Once you've built your desired intensity, use a clean blending brush to gently diffuse the edges where the shimmer meets your crease.
Pro tip: A fingertip can be especially effective for metallic eyeshadows because it presses pigment directly onto the lid. Use a brush afterward to refine the edges and reach smaller areas with precision.
Step 2. Add Smoky Definition Along the Lower Lash Line
Using a short, dense smudging brush, pick up the deep brown shade (bottom right). Start at the outer corner of your lower lash line and gently press the pigment into the roots of your lashes. Work inward toward the center, keeping the color close to the lash line for a controlled smoky effect.
For added drama, extend the brown shadow across the outer two-thirds of your lower lash line, then soften the edges with a clean pencil brush.
Next, use any remaining pigment on your brush to add subtle depth to the outer corner of your upper lash line, gently connecting the upper and lower shadows. This creates a softly smoked-out frame around the eyes without overpowering the olive shimmer.
Pro tip: Apply your lower lash-line shadow while looking straight ahead into a mirror. Keeping your eyes open helps you control the shape and avoid bringing the shadow too far down, which can make the look appear heavier than intended.
Step 3. Illuminate the Inner Corners With Rose Gold
Now for the detail that brings the entire look to life. Using a small detailer brush or your pinky finger, pick up the rose gold shimmer shade (center) and press it directly onto the inner corners of your eyes.
Concentrate the pigment around the tear-duct area, then softly blend it a few millimeters onto the inner portion of your upper and lower lash lines. The warm, reflective rose gold creates a beautiful contrast against the deeper olive tones, adding brightness and dimension exactly where the light naturally catches your eyes.
Pro tip: Keep your inner-corner highlight concentrated in a small area rather than sweeping it too far across the lid. This creates a more intentional, jewel-like flash of shimmer and prevents the two metallic shades from blending into one another.
Finish by lining your upper and lower waterlines with a deep brown liner and adding a few coats of volumizing mascara. For an even more dramatic effect, concentrate the mascara at the outer corners to complement the smoky shape.
One Palette, Endless Possibilities
The beauty of a thoughtfully curated palette is that the possibilities don't end with one look…or even three. Wear The Welcome for an intimate gathering, turn up the definition with The Toast, or reach for The Last Dance when the occasion calls for something unforgettable.
And don't be afraid to make each look your own. Add a little shimmer to your daytime eye, deepen your crease for an evening out, or experiment with unexpected shade combinations. With nine complementary colors at your fingertips, your next favorite makeup look is always just a few brushstrokes away.
Liked this post? Share!
Related Stories


How-To
How to Apply Tinted Brow Gel Like a Pro
4 min read


How-To
Skin Barrier 101: How to Repair Summer-Stressed Skin
4 min read
How-To
How to Apply Cream Blush Without Overthinking It
5 min read
How-To
The Secret to Better-Looking Makeup Isn’t What You Think
6 min read
How-To
Got a Cut on Your Face? Here’s How to Help It Heal Without Scarring
4 min read


How-To
Here’s How to Build Your Perfect Skincare Routine for Both Morning and Night

How-To
10 DIY Face Masks That Are Expert-Approved & Actually Work
How-To
How to Give Yourself a Salon-Worthy Facial At Home
10 min read
Beauty Picked Just for You
Get 5 products worth up to $70
Exclusive access to epic deals up to 80% off
Starting at just $15/month. Cancel anytime.